Overview
The Zebra WMI providers are installed as part of the Zebra Scanner SDK Installshield package. There are two WMI providers: Scanner WMI provider; and, Driver WMI provider. Two Windows services (Symbol Scanner Management and RSM Driver Provider Service) are installed and start automatically. These two services are called Zebra's WMI provider, also called the WMI plug-in.
For general installation instructions to install the Zebra Scanner SDK, refer to the installation instructions in the Scanner SDK for Windows Developer's Guide.
NOTE The Zebra CoreScanner Driver is a prerequisite for the Zebra WMI provider. The Zebra Scanner SDK Installshield® package automatically installs the CoreScanner Driver if it is not already on the system. A complete installation of the SDK installs the Zebra WMI provider. If you select the custom installation, you must select the Scanner WMI provider and Driver WMI provider components.
Basic Installation Verification
You can perform a basic inspection on your system process list to verify a successful installation of the Zebra WMI provider.
To do a simple check of the Zebra WMI provider's operation:
- Right click on the Windows Task Bar and select Task Manager.
-
Select the process tag in Windows 7, or Details tab in Windows 10 and 11.
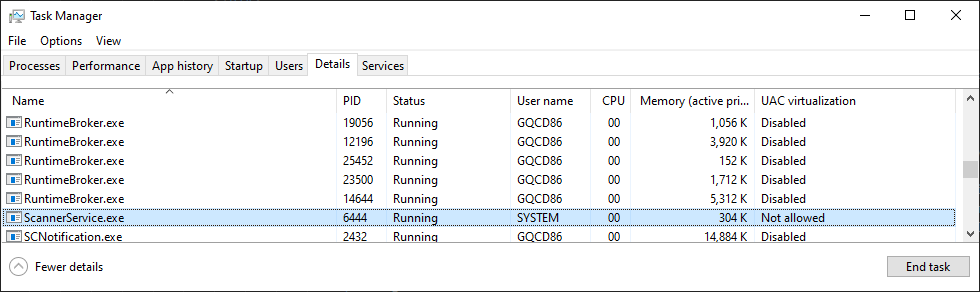 Figure 1: Windows Task Manager - Scanner
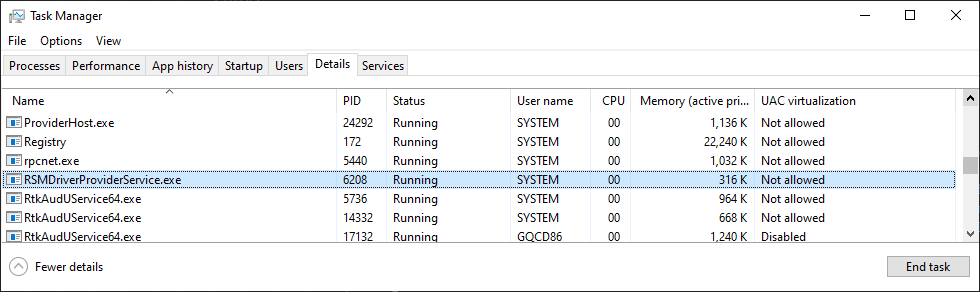 Figure 2: Windows Task Manager - Driver
- In the Image Name list, find RSMDriverProviderService.exe and ScannerService.exe. The presence of these two processes in the list indicates a successful installation.
Configuration
Scanner Configuration Bar Codes
Scan the Set All Defaults bar code below to return all parameters to the scanner's default values. Refer to the scanner's Product Reference Guide for default values.

Scan the bar code below to configure the scanner for the IBM Hand-held USB communication protocol.
USB Communication Protocol