Overview
This chapter provides detailed examples that demonstrate how to develop iOS applications on both Objective C and Swift using the Zebra Scanner Software Development Kit (SDK).
Zebra Scanner SDK iOS is written in Objective-C. Hence to access the SDK in Swift projects, it requires a bridging header to be created. Refer Configuring the Xcode Project section in Setup for more information.
Accessing the SDK
Create an instance of the Zebra Scanner SDK for iOS API inside of a class that conforms to the ISbtSdkApiDelegate. All available API functions are defined by the ISbtSdkApi Objective-C protocol. A single shared instance of an API object that implements the ISbtSdkApi can be obtained via createSbtSdkApiInstance method of the SbtSdkFactory class.
// Get instance to the Zebra Scanner SDK API
weak var   apiInstance = SbtSdkFactory.createSbtSdkApiInstance()

// Get the SDK version string
var sdkVersion = apiInstance?.sbtGetVersion() ?? ""
#import <ZebraScannerSDK/SbtSdkFactory.h>

// Get instance to the Zebra Scanner SDK API
id <ISbtSdkApi> apiInstance = [SbtSdkFactory createSbtSdkApiInstance];

// Get the SDK version string
NSString *version = [apiInstance sbtGetVersion];
Event Handling
The SDK supports a set of asynchronous notifications to inform the application about scanner related events. This includes connectivity related events (i.e., the appearance of a scanner) and scanner action events (i.e., received barcode data). All supported callbacks are defined by the ISbtSdkApiDelegate Objective-C protocol.
In order to receive asynchronous notifications from the SDK, the application performs the following steps:
-
Create an object that implements the ISbtSdkApiDelegate.
SwiftObjective C// Definition of a class that implements the ISbtSdkApiDelegate protocol class EventReceiver : NSObject, ISbtSdkApiDelegate { // TODO: variables } // TODO: methods definition#import <ZebraScannerSDK/ISbtSdkApi.h> // Definition of a class that implements the ISbtSdkApiDelegate protocol @interface EventReceiver : NSObject <ISbtSdkApiDelegate> { // TODO: variables } // TODO: methods definition -
Register the created object as notification receiver via the sbtSetDelegate function.
SwiftObjective C// Registration of the callback interface with the SDK var eventListener = EventReceiver() apiInstance?.sbtSetDelegate(eventListener)// Registration of the callback interface with SDK EventReceiver *eventListener = [[EventReceiver alloc] init]; [apiInstance sbtSetDelegate:eventListener]; -
Subscribe for specific asynchronous events using the sbtSubscribeForEvents method to specify which events should be reported by the SDK.
Valid notification/event mask values include:
- SBT_EVENT_BARCODE
- SBT_EVENT_SCANNER_APPEARANCE
- SBT_EVENT_SCANNER_DISAPPEARANCE
- SBT_EVENT_SESSION_ESTABLISHMENT
- SBT_EVENT_SESSION_TERMINATION
- SBT_EVENT_RAW_DATA.
SwiftObjective C// Subscribe to scanner appearance/disappearance, session establishment/termination and barcode event notifications. apiInstance?.sbtSubsribe(forEvents: Int32(SBT_EVENT_SCANNER_APPEARANCE) | Int32(SBT_EVENT_SCANNER_DISAPPEARANCE) |Int32(SBT_EVENT_SESSION_ESTABLISHMENT) | Int32(SBT_EVENT_SESSION_TERMINATION) | Int32(SBT_EVENT_BARCODE))// Subscribe to scanner appearance/disappearance, session establishment/termination and barcode event notifications. [apiInstance sbtSubsribeForEvents:SBT_EVENT_SCANNER_APPEARANCE | SBT_EVENT_SCANNER_DISAPPEARANCE | SBT_EVENT_SESSION_ESTABLISHMENT | SBT_EVENT_SESSION_TERMINATION | SBT_EVENT_BARCODE];
Events
If an object is registered as a notification receiver, the SDK calls the corresponding method of the registered object when a particular event occurs and the application is subscribed for events of this type.
Scanner Appeared Event
This event occurs when the presence of a scanner appears.
func sbtEventScannerAppeared(_ availableScanner: SbtScannerInfo!) {
    // TODO: Handle event
}
- (void)sbtEventScannerAppeared:(SbtScannerInfo*)availableScanner {
    // TODO: Handle event
}
Scanner Disappeared Event
This event occurs when a scanner is no longer present.
func sbtEventScannerDisappeared(_ scannerID: Int32) {
    // TODO: Handle event
}
- (void) sbtEventScannerDisappeared:(int)scannerID {
    // TODO: Handle event
}
Communication Session Established Event
This event occurs when communication is established with a scanner.
func sbtEventCommunicationSessionEstablished(_ activeScanner: SbtScannerInfo!) {
    // TODO: Handle event
}
- (void) sbtEventCommunicationSessionEstablished:(SbtScannerInfo*)activeScanner {
    // TODO: Handle event
}
Communication Session Terminated Event
This event occurs when communication with a scanner is terminated.
func sbtEventCommunicationSessionTerminated(_ scannerID: Int32) {
    // TODO: Handle event
}
- (void) sbtEventCommunicationSessionTerminated:(int)scannerID {
    // TODO: Handle event
}
Barcode Data Received Event
This event occurs when barcode data is read and received.
func sbtEventBarcodeData(_ barcodeData: Data!, barcodeType: Int32, fromScanner scannerID: Int32) {
    // TODO: Handle event
}
- (void) sbtEventBarcodeData:(NSData *)barcodeData barcodeType:(int)barcodeType fromScanner:(int)scannerID {
    // TODO: Handle event
}
Firmware Update Event
This event occurs when firmware update is in progress. You don't need to specifically subscribe to this event. You just have to implement this delegate method.
func sbtEventFirmwareUpdate(_ fwUpdateEventObj: FirmwareUpdateEvent!) {
    // TODO: Handle event
}
- (void) sbtEventFirmwareUpdate:(FirmwareUpdateEvent*)event {
    // TODO: Handle event
}
Connectivity Management
The SDK identifies scanners as "available" and "active". An "available" scanner is a scanner that is connected to the iOS device via Bluetooth, but has not yet established a communication session with the SDK. An "active" scanner is a scanner that is both connected to the iOS device via Bluetooth, and has established a communication session with the SDK.
The SDK supports simultaneous interaction with multiple scanners. To distinguish between various scanners, the SDK assigns a unique integer identifier for each scanner when it becomes available for the first time.
Set Operation Mode
Zebra Scanner SDK for iOS is designed to support interaction with scanners operating in BT MFi or BT LE mode. The SDK shall be configured to enable communication with a particular type of scanner by setting the operation mode.
Use the sbtSetOperationalMode function to set the required operational mode of the scanners to interface with.
Valid inputs include:
- SBT_OPMODE_MFI
- SBT_OPMODE_BTLE
- SBT_OPMODE_ALL.
// Set operational mode to all so that SDK can interface with scanners operating in MFI or BTLE mode.
apiInstance?.sbtSetOperationalMode(Int32(SBT_OPMODE_ALL))
// Set operational mode to all so that SDK can interface with scanners operating in MFI or BTLE mode.
[apiInstance sbtSetOperationalMode:SBT_OPMODE_ALL];
Enable Scanner Detection
The SDK supports automatic detection of appearance and disappearance of available scanners. When the "Available scanners detection" option is enabled, the SDK updates its internal list of available scanners and deliver a corresponding asynchronous notification once it detects connection or disconnection of a particular scanner to the iOS device via Bluetooth. If the option is disabled, the SDK updates its internal list of available scanners only when requested by the application via the sbtGetAvailableScannersList.
Use the sbtEnableAvailableScannersDetection method to actively detect appearance and disappearance of scanners.
// Actively detect appearance/disappearance of scanners
apiInstance?.sbtEnableAvailableScannersDetection(true)
// Actively detect appearance/disappearance of scanners
[apiInstance sbtEnableAvailableScannersDetection:YES];
Get Available and Active Scanners
The SDK maintains an internal list of active and available scanners. The following example demonstrates how to receive a list of available and active scanners from the SDK.
// Allocate an array to store the list of available scanners.
var availableScannerList: NSMutableArray? = NSMutableArray()

// Allocate an array to store the list of active scanners.
var activeScannerList: NSMutableArray? = NSMutableArray()

// Retrieve the list of currently available scanners.
apiInstance?.sbtGetAvailableScannersList(&availableScannerList)

// Retrieve the list of currently active scanners.
apiInstance?.sbtGetActiveScannersList(&activeScannerList)
// Allocate an array to store the list of available scanners.
NSMutableArray *availableScanners = [[NSMutableArray alloc] init];

// Allocate an array to store the list of active scanners.
NSMutableArray *activeScanners = [[NSMutableArray alloc] init];

// Retrieve the list of currently available scanners.
[apiInstance sbtGetAvailableScannersList:&availableScanners];

// Retrieve the list of currently active scanners.
[apiInstance sbtGetActiveScannersList:&activeScanners];
Connect to a Scanner
There are two methods to establish a connection with a scanner,
- Using Scan-To-Connect (STC) Pairing Barcode.
- Using the Manual pairing method.
Connect a Scanner Using Scan-To-Connect (STC) Pairing Barcode
Table 1: BARCODE_TYPE Attribute Values
| Description | Attribute Values |
|---|---|
| STC type | BARCODE_TYPE_STC |
Table 2: STC_COM_PROTOCOL Attribute Values
| Description | Attribute Values |
|---|---|
| SSI Bluetooth Low Energy | STC_SSI_BLE |
Table 3: SETDEFAULT_STATUS Attribute Values
| Description | Attribute Values |
|---|---|
| Enable Set Default | SETDEFAULT_YES |
| Disable Set Default | SETDEFAULT_NO |
The following code example demonstrates how to get the STC pairing barcode.
// Create an UIImageView with desired size for the STC pairing barcode.
var imageView = UIImageView(frame: CGRect(x: 40, y: 230, width: 240, height: 115))

// Get "Set Factory Defaults" disabled STC pairing barcode as an UIImage.
var stcBarcodeImage: UIImage = apiInstance?.sbtGetPairingBarcode(BARCODE_TYPE_STC, withComProtocol: STC_SSI_BLE, withSetDefaultStatus: SETDEFAULT_NO, withImageFrame: imageView.frame) ?? UIImage()

//Set UIImage to the created UIImageVIew.
imageView.image = stcBarcodeImage
// Create an UIImageView with desired size for the STC pairing barcode.
UIImageView *imageVIew = [[UIImageView alloc] initWithFrame:CGRectMake(40,230,240,115)];

// Get "Set Factory Defaults" disabled STC pairing barcode as an UIImage.
UIImage  *stcPairingBarcode = [apiInstance sbtGetPairingBarcode:BARCODE_TYPE_STC withComProtocol:STC_SSI_BLE withSetDefaultStatus:SETDEFAULT_NO withImageFrame:imageVIew.frame];

//Set UIImage to the created UIImageVIew.
[imageVIew setImage:stcPairingBarcode];
After scanning the STC pairing barcode, the scanner will be paired and get connected. Then the sbtEventCommunicationSessionEstablished event gets triggered.
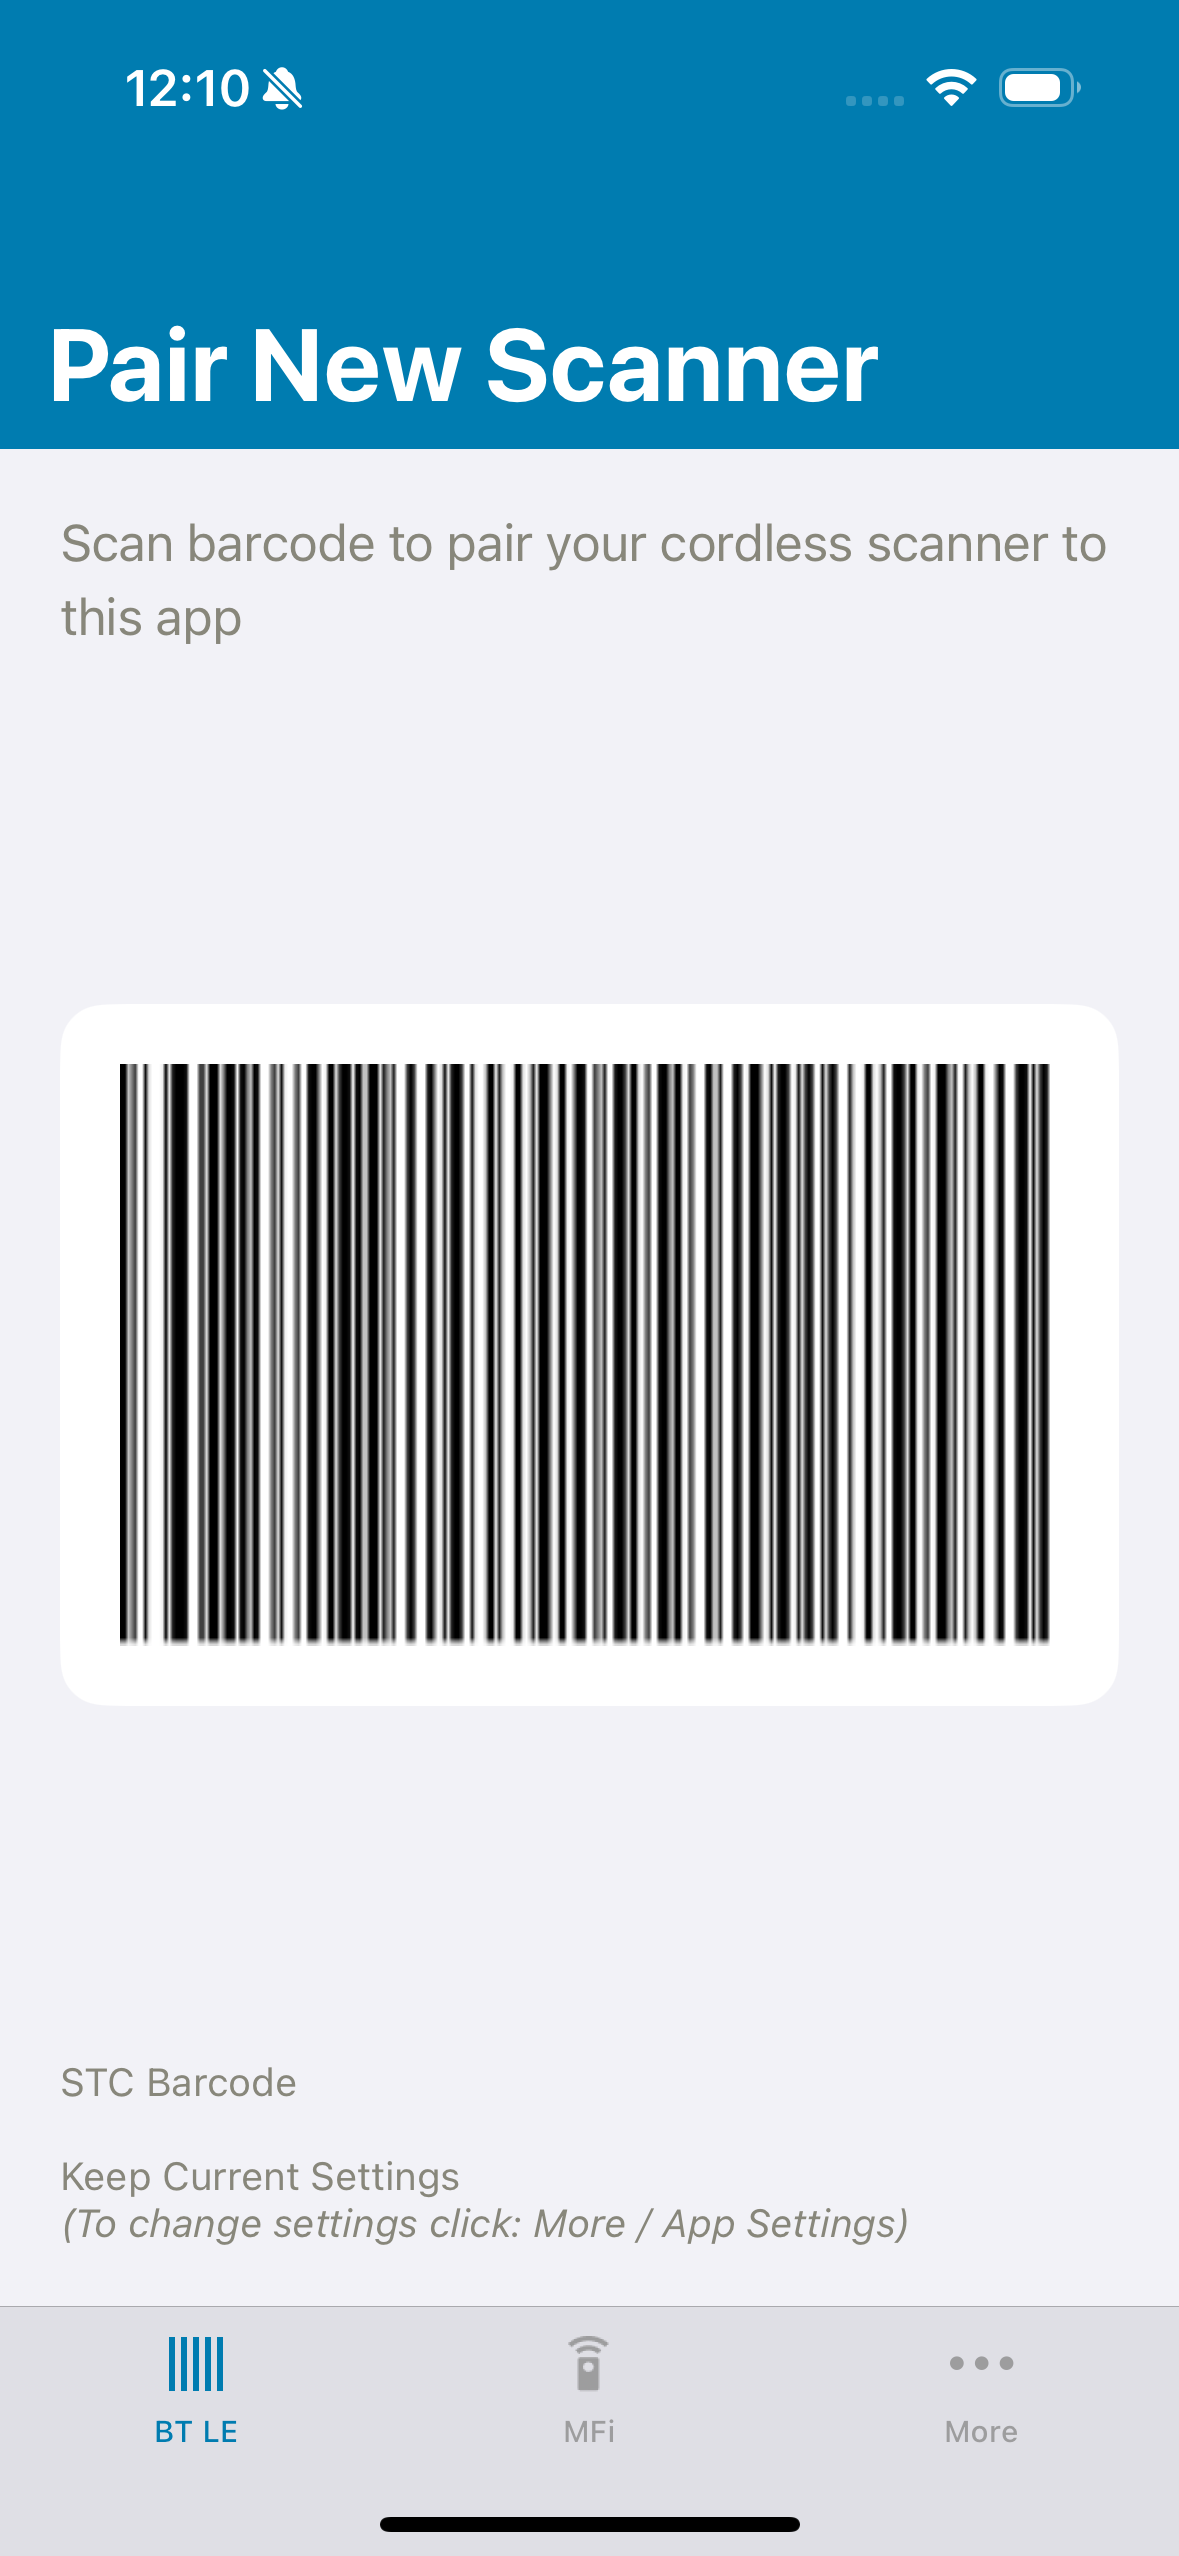 Figure 1: Zebra Scanner Control - STC Pairing Barcode
Using Manual Pairing
You can establish a connection with an available scanner by providing the scanner ID to the SDK's sbtEstablishCommunicationSession method.
// Attempt to establish a connection with the scanner device that has an ID = 3.
let result = apiInstance?.sbtEstablishCommunicationSession(Int32(3))

if (result == SBT_RESULT_SUCCESS) {
    // TODO: Process successful connection
} else {
    // TODO: Process error (unsuccessful connection)
}
// Attempt to establish a connection with the scanner device that has an ID = 3.
SBT_RESULT result = [apiInstance sbtEstablishCommunicationSession:3];

if (result == SBT_RESULT_SUCCESS) {
    // TODO: Process successful connection
}
else {
    // TODO: Process error (unsuccessful connection)
}
Disconnect from a Scanner
You can disconnect from an active scanner using the SDK's sbtTerminateCommunicationSession method.
// Attempt to disconnect from the scanner device that has an ID = 3.
let result = apiInstance?.sbtTerminateCommunicationSession(Int32(3))

if (result == SBT_RESULT_SUCCESS) {
    // TODO: Process successful disconnection
}
else {
    // TODO: Process error (unsuccessful disconnection)
}
// Attempt to disconnect from the scanner device that has an ID = 3.
SBT_RESULT result = [apiInstance sbtTerminateCommunicationSession:3];

if (result == SBT_RESULT_SUCCESS) {
    // TODO: Process successful disconnection
}
else {
    // TODO: Process error (unsuccessful connection)
}
Automatically Reconnect to a Scanner
The SDK supports "Automatic Session Reestablishment" option is used to automatically reconnect to a scanner that unexpectedly disappeared. If the "Automatic Session Reestablishment" option is enabled for a specific scanner, the SDK automatically attempts to reestablish a connection with the scanner when it becomes available again. The option has no effect if the application has intentionally terminated a communication session with the scanner via the sbtTerminateCommunicationSession function.
Use the sbtEnableAutomaticSessionReestablishment function to enable or disable automatic reconnection for a specific scanner.
// Set the automatic session reestablishment option for scanner ID 3
let result = apiInstance  ?.sbtEnableAutomaticSessionReestablishment(true, forScanner: 3)

if (result == SBT_RESULT_SUCCESS) {
    // TODO: Option successfully set
}
else {
    // TODO: Error (option was not set)
}
// Set the automatic session reestablishment option for scanner ID 3
SBT_RESULT result = [apiInstance sbtEnableAutomaticSessionReestablishment:YES forScanner:3];

if (result == SBT_RESULT_SUCCESS) {
    // TODO: Option successfully set
}
else {
    // TODO: Error (option was not set)
}
Automatically connect to the last connected scanner on app relaunch
The SDK supports "Auto connect to the last connected Scanner" option to automatically connect to the last connected scanner during app relaunch in Bluetooth Low Energy (BLE) mode. This option is disabled by default and if the "Auto connect to the last connected Scanner" option is enabled, the SDK automatically attempts to establish a connection with the last connected scanner during app relaunch.
Use sbtAutoConnectToLastConnectedScannerOnAppRelaunch function to enable or disable this feature. Call this function after initiating the SDK.
// Automatically attempts to establish a connection with the last connected scanner during app relaunch.
apiInstance?.sbtAutoConnectToLastConnectedScanner(onAppRelaunch: true)
// Automatically attempts to establish a connection with the last connected scanner during app relaunch.
[apiInstance sbtAutoConnectToLastConnectedScannerOnAppRelaunch:YES];
Performing Operations
The Zebra Scanner iOS SDK provides the capability to perform various scanner operations such as:
- Adjusting beeper settings
- Turning the LED on and off
- Enabling and disabling scanning
- Enabling and disabling supported symbologies
- Pulling and releasing the trigger
- Turning AIM on and off
- Activate page motor.
Get Beeper Settings
The get attribute command (SBT_RSM_ATTR_GET) is used to retrieve the beeper volume and frequency attribute values. The attribute values are returned from the scanner as an XML formatted string.
Table 4: Beeper Setting Attributes
| Attribute Description | Attribute Name |
|---|---|
| Beeper Volume | RMD_ATTR_BEEPER_VOLUME |
| Beeper Frequency | RMD_ATTR_BEEPER_FREQUENCY |
The following code example demonstrates how to retrieve the scanner's current beeper volume and frequency settings.
// Create XML string to request beeper volume and frequency settings for scanner ID 3
let inXML:String = "<inArgs><scannerID>3</scannerID><cmdArgs><arg-xml><attrib_list>\(RMD_ATTR_BEEPER_VOLUME),\(RMD_ATTR_BEEPER_FREQUENCY)</attrib_list></arg-xml></cmdArgs></inArgs>"

var outXml:NSMutableString  ? = NSMutableString()

// Retrieve beeper volume and frequency settings from Scanner ID 3
let result = self.apiInstance?.sbtExecuteCommand(Int32(SBT_RSM_ATTR_GET),aInXML: inXML, aOutXML: &outXml,forScanner: 3)

if (result == SBT_RESULT_SUCCESS) {
    // TODO: Process xml string containing requested beeper settings
}
else {
    // TODO: Process error
}
#import <ZebraScannerSDK/RMDAttributes.h>

// Create XML string to request beeper volume and frequency settings for scanner ID 3
NSString *xmlInput = [NSString stringWithFormat:@"
<inArgs><scannerID>%d</scannerID><cmdArgs><arg-xml><attrib_list>%d,%d</attrib_lis t></arg-xml></cmdArgs></inArgs>",3, RMD_ATTR_BEEPER_VOLUME, RMD_ATTR_BEEPER_FREQUENCY];

NSMutableString *xmlResponse = [[NSMutableString] alloc] init];

// Retrieve beeper volume and frequency settings from Scanner ID 3
SBT_RESULT result = [apiInstance sbtExecuteCommand:SBT_RSM_ATTR_GET aInXML:xmlInput aOutXML:&xmlResponse forScanner:3];

if (result == SBT_RESULT_SUCCESS) {
    // TODO: Process xml string containing requested beeper settings
}
else {
    // TODO: Process error
}
Set Beeper Volume
The set attribute command (SBT_RSM_ATTR_SET) is used to set the value of the beeper volume attribute (RMD_ATTR_BEEPER_VOLUME).
Table 5: Beeper Volume Attribute Values
| Description | Attribute Values |
|---|---|
| Low Beeper Volume | RMD_ATTR_VALUE_BEEPER_VOLUME_LOW |
| Medium Beeper Volume | RMD_ATTR_VALUE_BEEPER_VOLUME_MEDIUM |
| High Beeper Volume | RMD_ATTR_VALUE_BEEPER_VOLUME_HIGH |
The following code example demonstrates how to set the scanner's beeper volume:
// Create XML string to set the beeper volume on scanner ID 3 to LOW.
let inXML:String = "<inArgs><scannerID>3</scannerID><cmdArgs><arg-xml><attrib_list><attribute><id>\(RMD_ATTR_BEEPER_VOLUME)</id><datatype>B</datatype><value>\(RMD_ATTR_VALUE_BEEPER_VOLUME_LOW)</value></attribute></attrib_list></arg-xml></cmdArgs></inArgs>"

// Command Scanner ID 3 to set beeper volume to LOW.
let result = apiInstance?.sbtExecuteCommand(Int32(SBT_RSM_ATTR_SET),aInXML: inXML, aOutXML: nil, forScanner: 3)

if (result == SBT_RESULT_SUCCESS) {
    // TODO: Process successful operation
}
else {
    // TODO: Process error
}
#import <ZebraScannerSDK/RMDAttributes.h>

// Create XML string to set the beeper volume on scanner ID 3 to LOW.
NSString *xmlInput = [NSString stringWithFormat:@"<inArgs><scannerID>%d</scannerID><cmdArgs><arg-xml><attrib_list><attribute><id>%d</id><datatype>B</datatype><value>%d</value></attribute></attrib_list></arg-xml></cmdArgs></inArgs>",3, RMD_ATTR_BEEPER_VOLUME, RMD_ATTR_VALUE_BEEPER_VOLUME_LOW];

// Command Scanner ID 3 to set beeper volume to LOW.
SBT_RESULT result = [apiInstance sbtExecuteCommand:SBT_RSM_ATTR_SET aInXML:xmlInput aOutXML:nil forScanner:3];

if (result == SBT_RESULT_SUCCESS) {
    // TODO: Process successful operation
}
else {
    // TODO: Process error
}
Set Beeper Frequency
The set attribute command (SBT_RSM_ATTR_SET) is used to set the value of the beeper frequency attribute (RMD_ATTR_BEEPER_FREQUENCY).
Table 6: Beeper Frequency Attribute Values
| Description | Attribute Values |
|---|---|
| Beeper Frequency Low | RMD_ATTR_VALUE_BEEPER_FREQ_LOW |
| Beeper Frequency Medium | RMD_ATTR_VALUE_BEEPER_FREQ_MEDIUM |
| Beeper Frequency High | RMD_ATTR_VALUE_BEEPER_FREQ_HIGH |
The following code example demonstrates how to set the scanner's beeper frequency.
// Create XML string to set the beeper frequency on scanner ID 3 to HIGH.
let inXML:String = "<inArgs><scannerID>3</scannerID><cmdArgs><arg-xml><attrib_list><attribute><id>\(RMD_ATTR_BEEPER_FREQUENCY)</id><datatype>B</datatype><value>\(RMD_ATTR_VALUE_BEEPER_FREQ_HIGH  )</value></attribute></attrib_list></arg-xml></cmdArgs></inArgs>"

// Command Scanner ID 3 to set beeper frequency to HIGH.
let result = apiInstance?.sbtExecuteCommand(Int32(SBT_RSM_ATTR_SET),aInXML: inXML, aOutXML: nil,forScanner: 3)

if (result == SBT_RESULT_SUCCESS) {
    // TODO: Process successful operation
}
else {
    // TODO: Process error
}
#import <ZebraScannerSDK/RMDAttributes.h>

// Create XML string to set the beeper frequency on scanner ID 3 to HIGH.
NSString *xmlInput = [NSString stringWithFormat:@"<inArgs><scannerID>%d</scannerID><cmdArgs><arg-xml><attrib_list><attribute><id>%d</id><datatype>B</datatype><value>%d</value></attribute></attrib_list></arg-xml></cmdArgs></inArgs>",3, RMD_ATTR_BEEPER_FREQUENCY, RMD_ATTR_VALUE_BEEPER_FREQ_HIGH];

// Command Scanner ID 3 to set beeper frequency to HIGH.
SBT_RESULT result = [apiInstance sbtExecuteCommand:SBT_RSM_ATTR_SET aInXML:xmlInput aOutXML:nil forScanner:3];

if (result == SBT_RESULT_SUCCESS) {
    // TODO: Process successful operation
}
else {
    // TODO: Process error
}
Beep Control
Command the scanner's beeper to emit sound by using the sbtExecuteCommand API. Use command op code SBT_SET_ACTION and an attribute value shown in table below.
Table 7: Beeper Attribute Values
| Description | Attribute Values |
|---|---|
| One high short beep | RMD_ATTR_VALUE_ACTION_HIGH_SHORT_BEEP_1 |
| Two high short beeps | RMD_ATTR_VALUE_ACTION_HIGH_SHORT_BEEP_2 |
| Three high short beeps | RMD_ATTR_VALUE_ACTION_HIGH_SHORT_BEEP_3 |
| Four high short beeps | RMD_ATTR_VALUE_ACTION_HIGH_SHORT_BEEP_4 |
| Five high short beeps | RMD_ATTR_VALUE_ACTION_HIGH_SHORT_BEEP_5 |
| One low short beep | RMD_ATTR_VALUE_ACTION_LOW_SHORT_BEEP_1 |
| Two low short beeps | RMD_ATTR_VALUE_ACTION_LOW_SHORT_BEEP_2 |
| Three low short beeps | RMD_ATTR_VALUE_ACTION_LOW_SHORT_BEEP_3 |
| Four low short beeps | RMD_ATTR_VALUE_ACTION_LOW_SHORT_BEEP_4 |
| Five low short beeps | RMD_ATTR_VALUE_ACTION_LOW_SHORT_BEEP_5 |
| One high long beep | RMD_ATTR_VALUE_ACTION_HIGH_LONG_BEEP_1 |
| Two high long beeps | RMD_ATTR_VALUE_ACTION_HIGH_LONG_BEEP_2 |
| Three high long beeps | RMD_ATTR_VALUE_ACTION_HIGH_LONG_BEEP_3 |
| Four high long beeps | RMD_ATTR_VALUE_ACTION_HIGH_LONG_BEEP_4 |
| Five high long beeps | RMD_ATTR_VALUE_ACTION_HIGH_LONG_BEEP_5 |
| One low long beep | RMD_ATTR_VALUE_ACTION_LOW_LONG_BEEP_1 |
| Two low long beeps | RMD_ATTR_VALUE_ACTION_LOW_LONG_BEEP_2 |
| Three low long beeps | RMD_ATTR_VALUE_ACTION_LOW_LONG_BEEP_3 |
| Four low long beeps | RMD_ATTR_VALUE_ACTION_LOW_LONG_BEEP_4 |
| Five low long beeps | RMD_ATTR_VALUE_ACTION_LOW_LONG_BEEP_5 |
| Fast warble beep | RMD_ATTR_VALUE_ACTION_FAST_WARBLE_BEEP |
| Slow warble beep | RMD_ATTR_VALUE_ACTION_SLOW_WARBLE_BEEP |
| High-low beep | RMD_ATTR_VALUE_ACTION_HIGH_LOW_BEEP |
| Low-high beep | RMD_ATTR_VALUE_ACTION_LOW_HIGH_BEEP |
| High-low-high beep | RMD_ATTR_VALUE_ACTION_HIGH_LOW_HIGH_BEEP |
| Low-high-low beep | RMD_ATTR_VALUE_ACTION_LOW_HIGH_LOW_BEEP |
The following code example demonstrates how to command the scanner's beeper to emit a high short beep sound.
// Specify the scanner ID 3 and attribute value of the beeper command in the XML.
let inXML:String = "3\(RMD_ATTR_VALUE_ACTION_HIGH_SHORT_BEEP_1)
#import <ZebraScannerSDK/RMDAttributes.h>

// Specify the scanner ID 3 and attribute value of the beeper command in the XML.
NSString *inXML = [NSString stringWithFormat:@"<inArgs><scannerID>%d</scannerID><cmdArgs><arg-int>%d</arg-int></cmdArgs></inArgs>", 3, RMD_ATTR_VALUE_ACTION_HIGH_SHORT_BEEP_1];

// Execute the beep command.
SBT_RESULT result = [apiInstance sbtExecuteCommand:SBT_SET_ACTION aInXML:inXML aOutXML:nil forScanner: 3];

if (result == SBT_RESULT_SUCCESS) {
    // TODO: Process successful operation.
}
else {
    // TODO: Process error.
}
LED Control
Control the scanner's LED by using the sbtExecuteCommand API. Use command opcode SBT_SET_ACTION and an attribute value shown in tha table below.
Table 8: LED Attribute Values
| Description | Attribute Values |
|---|---|
| Turn Green LED off | RMD_ATTR_VALUE_ACTION_LED_GREEN_OFF |
| Turn Green LED on | RMD_ATTR_VALUE_ACTION_LED_GREEN_ON |
| Turn Yellow LED on | RMD_ATTR_VALUE_ACTION_LED_YELLOW_ON |
| Turn Yellow LED off | RMD_ATTR_VALUE_ACTION_LED_YELLOW_OFF |
| Turn Red LED on | RMD_ATTR_VALUE_ACTION_LED_RED_ON |
| Turn Red LED off | RMD_ATTR_VALUE_ACTION_LED_RED_OFF |
The following code example demonstrates how to command the scanner's LED to illuminate green.
// Specify the scanner ID = 3 and attribute value of the LED command in the XML.
let inXML:String = "<inArgs><scannerID>3</scannerID><cmdArgs><arg-int>\(RMD_ATTR_VALUE_ACTION_LED_GREEN_ON)</arg-int></cmdArgs></inArgs>"

// Execute   the LED command.
let result = apiInstance?.sbtExecuteCommand(Int32(SBT_SET_ACTION),aInXML: inXML, aOutXML: nil,forScanner: 3)

if (result == SBT_RESULT_SUCCESS) {
    // TODO: Process successful operation
}
else {
    // TODO: Process error
}
#import <ZebraScannerSDK/RMDAttributes.h>

// Specify the scanner ID 3 and attribute value of the LED command in the XML
NSString *inXML = [NSString stringWithFormat:@"<inArgs><scannerID>%d</scannerID><cmdArgs><arg-int>%d</arg-int></cmdArgs></inArgs>", 3, RMD_ATTR_VALUE_ACTION_LED_GREEN_ON];

// Execute the LED command
SBT_RESULT result = [apiInstance sbtExecuteCommand:SBT_SET_ACTION aInXML:inXML aOutXML:nil forScanner: 3];

if (result == SBT_RESULT_SUCCESS) {
    // TODO: Process successful operation.
}
else {
    // TODO: Process error.
}
Enable Scanning
The scan enable command (SBT_DEVICE_SCAN_ENABLE) is used to enable the device's scanning capability. The following code example demonstrates how to enable the scan capability.
// Create XML string to enable scanning on scanner ID 3
let inXML:String = "<inArgs><scannerID>3</scannerID></inArgs>"

// Command scanner ID 3 to enable scanning
let result = apiInstance?.sbtExecuteCommand(Int32(SBT_DEVICE_SCAN_ENABLE),aInXML: inXML, aOutXML: nil,forScanner: 3)

if (result == SBT_RESULT_SUCCESS) {
    // TODO: Process successful operation
}
else {
    // TODO: Process error
}
// Create XML string to enable scanning on scanner ID 3
NSString *xmlInput = [NSString stringWithFormat:@"<inArgs><scannerID>%d</scannerID></inArgs>",scannerId];

// Command scanner ID 3 to enable scanning
SBT_RESULT result = [apiInstance sbtExecuteCommand:SBT_DEVICE_SCAN_ENABLE aInXML:xmlInput aOutXML:nil forScanner:3];

if (result == SBT_RESULT_SUCCESS) {
    // TODO: Process successful operation
}
else {
    // TODO: Process error
}
Disable Scanning
The scan disable command (SBT_DEVICE_SCAN_DISABLE) is used to disable the device's scanning capability. The following code example demonstrates how to disable the scan capability.
// Create XML string to disable scanning on scanner ID 3
let inXML:String = "<inArgs><scannerID>3</scannerID></inArgs>"

// Command scanner ID 3 to disable scanning
let result = apiInstance?.sbtExecuteCommand(Int32(SBT_DEVICE_SCAN_DISABLE),aInXML: inXML, aOutXML: nil,forScanner: 3)

if (result == SBT_RESULT_SUCCESS) {
    // TODO: Process successful operation
}
else {
    // TODO: Process error
}
// Create XML string to disable scanning on scanner ID 3
NSString *xmlInput = [NSString stringWithFormat:@"<inArgs><scannerID>%d</scannerID></inArgs>",scannerId];

// Command scanner ID 3 to disable scanning
SBT_RESULT result = [apiInstance sbtExecuteCommand:SBT_DEVICE_SCAN_DISABLE aInXML:xmlInput aOutXML:nil forScanner:3];

if (result == SBT_RESULT_SUCCESS) {
    // TODO: Process successful operation
}
else {
    // TODO: Process error
}
Get Supported Symbology IDs
The get all attributes command (SBT_RSM_ATTR_GETALL) is used to retrieve all the attributes of a scanner. All attributes will be returned from the scanner as an XML formatted string. Supported symbology list of a scanner can be filtered out by processing the attribute list. Following table includes valid symbology attribute values.
Table 9: Symbology Attribute Values
| Description | Attribute Values |
|---|---|
| UPC-A | RMD_ATTR_SYM_UPC_A |
| UPC-E | RMD_ATTR_SYM_UPC_E |
| UPC-E1 | RMD_ATTR_SYM_UPC_E_1 |
| EAN-8/JAN8 | RMD_ATTR_SYM_EAN_8_JAN_8 |
| EAN-13/JAN13 | RMD_ATTR_SYM_EAN_13_JAN_13 |
| Bookland EAN | RMD_ATTR_SYM_BOOKLAND_EAN |
| Code 128 | RMD_ATTR_SYM_CODE_128 |
| UCC/EAN-128 | RMD_ATTR_SYM_UCC_EAN_128 |
| Code 39 | RMD_ATTR_SYM_CODE_39 |
| Code 93 | RMD_ATTR_SYM_CODE_93 |
| Code 11 | RMD_ATTR_SYM_CODE_11 |
| Interleaved 2 of 5 | RMD_ATTR_SYM_INTERLEAVED_2_OF_5 |
| Discrete 2 of 5 | RMD_ATTR_SYM_DISCRETE_2_OF_5 |
| Chinese 2 of 5 | RMD_ATTR_SYM_CHINESE_2_OF_5 |
| Codabar | RMD_ATTR_SYM_CODABAR |
| MSI | RMD_ATTR_SYM_MSI |
| Code 32 | RMD_ATTR_SYM_CODE_32 |
| Data Matrix | RMD_ATTR_SYM_DATAMATRIXQR |
| RMD_ATTR_SYM_PDF | |
| ISBT 128 | RMD_ATTR_SYM_ISBT_128 |
| UCCCouponExtendedCode | RMD_ATTR_UCC_COUPEN_EXTENDED_CODE |
| US Postnet | RMD_ATTR_SYM_US_Postnet |
| US Planet | RMD_ATTR_SYM_US_Planet |
| UKPost | RMD_ATTR_SYM_UK_POST |
| USPostal Check Digit | RMD_ATTR_SYM_US_POSTAL_CHECK_DIGIT |
| UKPostal Check Digit | RMD_ATTR_SYM_UK_POSTAL_CHECK_DIGIT |
| JapanPost | RMD_ATTR_SYM_JAPAN_POST |
| AusPost | RMD_ATTR_SYM_AUS_POST |
| GS1DataBar14 | RMD_ATTR_SYM_GS1_DATABAR_14 |
| GS1DataBarLimited | RMD_ATTR_SYM_GS1_DATABAR_LIMITED |
| GS1DataBarExpanded | RMD_ATTR_SYM_GS1_DATABAR_EXPANDED |
| MicroPDF | RMD_ATTR_SYM_MICRO_PDF |
| MaxiCode | RMD_ATTR_SYM_MAXI_CODE |
| ISSN EAN | RMD_ATTR_ISSN_EAN |
| Matrix 2 of 5 | RMD_ATTR_MATRIX_2_OF_5 |
| Korean 3 of 5 | RMD_ATTR_KOREAN_3_OF_5 |
| QR Code | RMD_ATTR_QR_CODE |
| Micro QR Code | RMD_ATTR_MICRO_QR |
| Aztec | RMD_ATTR_AZTEC |
| HanXin | RMD_ATTR_HANXIN |
| Composite CC-C | RMD_ATTR_COMPOSITE_CC_C |
| Composite CC-A/B | RMD_ATTR_COMPOSITE_CC_A_B |
| Composite TLC-39 | RMD_ATTR_COMPOSITE_TLC_39 |
| Netherlands KIX | RMD_ATTR_SYM_Netherlands_KIX |
| UPU FICS | RMD_ATTR_SYM_UPU_FICS |
| USPS 4CB/ONE Code/Intelligent Mail | RMD_ATTR_SYM_USPS_4CB_ONECODE_INTELLIGENT_MAIL |
The following code example demonstrates how to get all supported symbologies by using the get all attributes command.
// Create XML string to request all   attributes of scanner ID 3
let inXML:String = "<inArgs><scannerID>3</scannerID></inArgs>"
var outXml:NSMutableString  ? = NSMutableString()

// Retrieve all   attributes of scanner device that has an ID = 3
let result = apiInstance?.sbtExecuteCommand(Int32(SBT_RSM_ATTR_GETALL),aInXML: inXML, aOutXML: &outXml,forScanner: 3)

if (result == SBT_RESULT_SUCCESS) {
    // TODO: Process xml string containing all attributes get supported symbologies
}
else {
    // TODO: Process error
}
// Create XML string to request all attributes of scanner ID 3
NSString *xmlInput = [NSStringstringWithFormat:@"<inArgs><scannerID>%d</scannerID></inArgs>",3];
NSMutableString *xmlResponse = [[NSMutableString] alloc] init];

// Retrieve all attributes of scanner device that has an ID = 3.
SBT_RESULT result = [apiInstance sbtExecuteCommand:SBT_RSM_ATTR_GETALL aInXML:xmlInput aOutXML:&xmlResponse forScanner:3];

if (result == SBT_RESULT_SUCCESS) {
    // TODO: Process xml string containing all attributes to get supported symbologies
}
else {
    // TODO: Process error
}
Get Symbology Values
The get attribute command (SBT_RSM_ATTR_GET) is used to retrieve the value of a symbology. The symbology value is returned from the scanner as an XML formatted string.
The following code example demonstrates how to retrieve the values of symbologies.
// Create XML string to request value of supported symbology ID's 1 and 8 for scanner ID 3
let inXML:String = "<inArgs><scannerID>3</scannerID><cmdArgs><arg-xml><attrib_list>1,8<attrib_list></arg-xml></cmdArgs></inArgs>"
var outXml:NSMutableString? = NSMutableString()

// Retrieved values of symbologies for scanner ID = 3.
let result = self.apiInstance?.sbtExecuteCommand(Int32(SBT_RSM_ATTR_GET),aInXML: inXML, aOutXML: &outXml,forScanner: 3)

if (result == SBT_RESULT_SUCCESS) {
    // TODO: Process xml string containing symbology values.
}
else {
    // TODO: Process error
}
// Create XML string to request value of supported symbology ID's 1 and 8 for scanner ID 3
NSString *xmlInput = [NSString stringWithFormat:@"<inArgs><scannerID>%d</scannerID><cmdArgs><arg-xml><attrib_lis t>1,8</attrib_list></arg-xml></cmdArgs></inArgs>",3];
NSMutableString *xmlResponse = [[NSMutableString] alloc] init];

// Retrieved values of symbologies for scanner ID = 3.
SBT_RESULT result = [apiInstance sbtExecuteCommand:SBT_RSM_ATTR_GET aInXML:xmlInput aOutXML:&xmlResponse forScanner:3];

if (result == SBT_RESULT_SUCCESS) {
    // TODO: Process xml string containing symbology values
}
else {
    // TODO: Process error
}
Set Symbology Values
The set attribute command (SBT_RSM_ATTR_SET) is used to set the value of a symbology. The symbology value is returned from the scanner as an XML formatted string.
The following code example demonstrates how to set the value of symbology.
// Create XML string to set value of symbology ID 8 for scanner ID = 3 to "True"
let inXML:String = "<inArgs><scannerID>3</scannerID><cmdArgs><arg-xml><attrib_list><attribute><id>8</id><datatype>F</datatype><value>True</value></attribute></attrib_list></arg-xml></cmdArgs></inArgs>"

// Set value of symbology ID 8 for scanner ID = 3 to "True"
let result = apiInstance?.sbtExecuteCommand(Int32(SBT_RSM_ATTR_SET),aInXML: inXML, aOutXML: nil,forScanner: Int32(scannerId))

if (result == SBT_RESULT_SUCCESS) {
    // TODO: Process successful operation
}
else {
    // TODO: Process error
}
// Create XML string to set value of symbology ID 8 for scanner ID 3 to "True"
NSString *xmlInput = [NSString stringWithFormat:@"<inArgs><scannerID>%d</scannerID><cmdArgs><arg-xml><attrib_list><attribute><id>%d</id><datatype>F</datatype><value>%@</value></attribute></attrib_list></arg-xml></cmdArgs></inArgs>",3,8,"True"];

// Set value of symbology ID 8 for scanner ID = 3 to "True"
SBT_RESULT result = [apiInstance sbtExecuteCommand:SBT_RSM_ATTR_SET aInXML:xmlInput aOutXML:nil forScanner:3];

if (result == SBT_RESULT_SUCCESS) {
    // TODO: Process successful operation
}
else {
    // TODO: Process error
}
Pull Trigger
The pull trigger command (SBT_DEVICE_PULL_TRIGGER) is used to pull the device's trigger. The following code example demonstrates how to command the scanner's trigger to be pulled.
// Create XML string to command scanner ID 3 to pull the trigger
let inXML:String = "3
// Create XML string to command scanner ID 3 to pull the trigger
NSString *xmlInput = [NSString stringWithFormat:@"<inArgs><scannerID>%d</scannerID></inArgs>",scannerId];

// Command scanner ID 3 to pull the trigger
SBT_RESULT result = [apiInstance sbtExecuteCommand:SBT_DEVICE_PULL_TRIGGER aInXML:xmlInput aOutXML:nil forScanner:3];

if (result == SBT_RESULT_SUCCESS) {
    // TODO: Process successful operation
}
else {
    // TODO: Process error
}
Release Trigger
The release trigger command (SBT_DEVICE_RELEASE_TRIGGER) is used to release the device's trigger. The following code example demonstrates how to command the scanner's trigger to be released.
// Create XML string to command scanner ID 3 to release the trigger
let inXML:String = "<inArgs><scannerID>3</scannerID></inArgs>"

// Command scanner ID 3 to release the trigger
let result = apiInstance?.sbtExecuteCommand(Int32(SBT_DEVICE_RELEASE_TRIGGER),aInXML: inXML, aOutXML: nil,forScanner: 3)

if (result == SBT_RESULT_SUCCESS) {
    // TODO: Process successful operation
}
else {
    // TODO: Process error
}
// Create XML string to command scanner ID 3 to release the trigger
NSString *xmlInput = [NSString stringWithFormat:@"<inArgs><scannerID>%d</scannerID></inArgs>",scannerId];

// Command scanner ID 3 to pull the trigger
SBT_RESULT result = [apiInstance sbtExecuteCommand:SBT_DEVICE_RELEASE_TRIGGER aInXML:xmlInput aOutXML:nil forScanner:3];

if (result == SBT_RESULT_SUCCESS) {
    // TODO: Process successful operation
}
else {
    // TODO: Process error
}
AIM On
The Aim On command (SBT_DEVICE_AIM_ON) is used to Aim on. The following code example demonstrates how to command the scanner's Aim function should be ON.
// Create XML string to command scanner ID 3 to turn on the aim
let inXML:String = "<inArgs><scannerID>3</scannerID></inArgs>"
// Command scanner ID 3 to turn on the aim
let result = apiInstance?.sbtExecuteCommand(Int32(SBT_DEVICE_AIM_ON),aInXML: inXML, aOutXML: nil,forScanner: 3)

if (result == SBT_RESULT_SUCCESS) {
    // TODO: Process successful operation
} else {
    // TODO: Process error
}
// Create XML string to command scanner ID 3 to turn on the aim
NSString *xmlInput = [NSString stringWithFormat:@"<inArgs><scannerID>%d</scannerID></inArgs>",3];

// Command scanner ID 3 to turn on the aim
SBT_RESULT result = [apiInstance sbtExecuteCommand:SBT_DEVICE_AIM_ON aInXML:xmlInput aOutXML:nil forScanner:3];

if (result == SBT_RESULT_SUCCESS) {
    // TODO: Process successful operation
}
else {
    // TODO: Process error
}
AIM Off
The Aim Off command (SBT_DEVICE_AIM_OFF) is used to turn off the aim. The following code example demonstrates how to command the scanner to turn off the aim.
// Create XML string to command scanner ID 3 to turn off the aim
let inXML:String = "<inArgs><scannerID>3</scannerID></inArgs>"
// Command scanner ID 3 to turn off the aim
let result = apiInstance?.sbtExecuteCommand(Int32(SBT_DEVICE_AIM_OFF),aInXML: inXML, aOutXML: nil,forScanner: 3)

if (result == SBT_RESULT_SUCCESS) {
    // TODO: Process successful operation
}
else {
    // TODO: Process error
}
// Create XML string to command scanner ID 3 to turn off the aim
NSString *xmlInput = [NSString stringWithFormat:@"<inArgs><scannerID>%d</scannerID></inArgs>",scannerId];

// Command scanner ID 3 to turn off the aim
SBT_RESULT result = [apiInstance sbtExecuteCommand:SBT_DEVICE_AIM_OFF aInXML:xmlInput aOutXML:nil forScanner:3];

if (result == SBT_RESULT_SUCCESS) {
    // TODO: Process successful operation
}
else {
    // TODO: Process error
}
Page Motor Function
The vibration feedback command (SBT_DEVICE_VIBRATION_FEEDBACK) is used to activate the page motor. The following code example demonstrates how to command the scanner's page motor to be activated.
// Create XML string to command scanner ID 3 to activate the page motor
let inXML:String = "<inArgs><scannerID>3</scannerID></inArgs>"

// Command scanner ID 3 to activate the page motor
let result = apiInstance?.sbtExecuteCommand(Int32(SBT_DEVICE_VIBRATION_FEEDBACK),aInXML: inXML, aOutXML: nil,forScanner: 3)

if (result == SBT_RESULT_SUCCESS) {
    // TODO: Process successful operation
}
else {
    // TODO: Process error
}
// Create XML string to command scanner ID 3 to activate page motor.
NSString *xmlInput = [NSString stringWithFormat:@"<inArgs><scannerID>%d</scannerID></inArgs>",scannerId];

// Command for scanner ID 3 to pull the page motor.
SBT_RESULT result = [apiInstance sbtExecuteCommand:SBT_DEVICE_VIBRATION_FEEDBACK aInXML:xmlInput aOutXML:nil forScanner: scannerId];

if (result == SBT_RESULT_SUCCESS) {
    // TODO: Process successful operation.
}
else {
    // TODO: Process error.
}
Update Firmware with DAT File
The firmware update command (SBT_UPDATE_FIRMWARE) is used to update firmware by DAT file. The following code example demonstrates how to command the scanner to update firmware by DAT file.
// Create XML string to command scanner ID 3 to update firmware
// selectedFWFilePath = absolute path of the DAT file
let inXML:String = "<inArgs><scannerID>3</scannerID><cmdArgs><arg-string>\(selectedFWFilePath)</arg-string></cmdArgs></inArgs>"

// Command scanner ID 3 to update firmware
let result = apiInstance?.sbtExecuteCommand(Int32(SBT_UPDATE_FIRMWARE),aInXML: inXML, aOutXML: nil,forScanner: 3)

if (result == SBT_RESULT_SUCCESS) {
    // TODO: Process successful operation
}
else {
    // TODO: Process error
}
// Create XML string to command scanner ID 3 to update firmware
// selectedFWFilePath = absolute path of the DAT file
NSString *in_xml = [NSString stringWithFormat:@"<inArgs><scannerID>%d</scannerID><cmdArgs><arg-string>%@</arg- string></cmdArgs></inArgs>", m_ScannerID, selectedFWFilePath];

// Command scanner ID 3 to update firmware
SBT_RESULT result = [apiInstance sbtExecuteCommand:SBT_UPDATE_FIRMWARE aInXML:xmlInput aOutXML:nil forScanner:3];

if (result == SBT_RESULT_SUCCESS) {
    // TODO: Process successful operation
}
else {
    // TODO: Process error
}
Update Firmware with Plug-in File
The firmware update command (SBT_UPDATE_FIRMWARE_FROM_PLUGIN) is used to update firmware by plug-in file. The following code example demonstrates how to command the scanner to update firmware by plug-in file.
// Create XML string to command scanner ID 3 to update firmware
// selectedFWFilePath = absolute path of the plugin file
let inXML:String = "<inArgs><scannerID>3</scannerID><cmdArgs><arg-string>\(selectedFWFilePath)</arg-string></cmdArgs></inArgs>"

// Command scanner ID 3 to update firmware
let result = apiInstance?.sbtExecuteCommand(Int32(SBT_UPDATE_FIRMWARE_FROM_PLUGIN),aInXML: inXML, aOutXML: nil,forScanner: 3)

if (result == SBT_RESULT_SUCCESS) {
    // TODO: Process successful operation
}
else {
    // TODO: Process error
}
// Create XML string to command scanner ID 3 to update firmware by plugin.
// selectedFWFilePath = absolute path of the plugin file.
NSString *in_xml = [NSString stringWithFormat:@"<inArgs><scannerID>%d</scannerID><cmdArgs><arg-string>%@</arg- string></cmdArgs></inArgs>", m_ScannerID, selectedFWFilePath];

// Command for scanner ID 3 to update firmware.
SBT_RESULT result = [apiInstance sbtExecuteCommand:SBT_UPDATE_FIRMWARE_FROM_PLUGIN aInXML:xmlInput aOutXML:nil forScanner: scannerId];

if (result == SBT_RESULT_SUCCESS) {
    // TODO: Process successful operation.
}
else {
    // TODO: Process error.
}
Abort Firmware Update
The abort firmware update command (SBT_DEVICE_ABORT_UPDATE_FIRMWARE) is used to abort ongoing firmware update.
// Create XML string to command scanner ID 3 to abort the firmware update.
let inXML:String = "<inArgs><scannerID>3</scannerID></inArgs>"

// Command scanner ID 3 to abort firmware update
let result = apiInstance?.sbtExecuteCommand(Int32(SBT_DEVICE_ABORT_UPDATE_FIRMWARE),aInXML: inXML, aOutXML: nil,forScanner: 3)

if (result == SBT_RESULT_SUCCESS) {
    // TODO: Process successful operation
}
else {
    // TODO: Process error
}
// Create XML string to command scanner ID 3 to abort the firmware update.
NSString *in_xml = [NSString stringWithFormat:@"<inArgs><scannerID>%d</scannerID></inArgs>", scannerId];

// Command scanner ID 3 to abort the firmware update.
SBT_RESULT res = [apiInstance executeCommand:SBT_DEVICE_ABORT_UPDATE_FIRMWARE aInXML:in_xml aOutXML:nil forScanner:scannerId];

if (result == SBT_RESULT_SUCCESS) {
    // TODO: Process successful operation.
}
else {
    // TODO: Process error.
}
Virtual Tether
Virtual tether is designed to alert users when a device is taken out of range. It includes an audible, visual (includes the LEDs and illumination) and haptic alarm on the scanner if the Bluetooth connection is broken. Virtual tether alarm is disabled by default.
It is required to disable virtual tether alarm before performing a firmware update.
The store attribute command (SBT_RSM_ATTR_STORE) is used to store the value of the relevant attribute id for enabling or disabling the virtual tether alarm.
The following code example demonstrates how to enable the virtual tether alarm on the scanner.
// Create XML string to set the value of attribute id (2053) to 1 of scanner ID 3.
let inXML:String = "<inArgs><scannerID>\(scannerId)</scannerID><cmdArgs><arg-xml><attrib_list><attribute><id>\(attributeId)</id><datatype>B</datatype><value>1</value></attribute></attrib_list></arg-xml></cmdArgs></inArgs>"

// Store the value to enable the virtual tether alarm on the scanner id 3.
let result = apiInstance?.sbtExecuteCommand(Int32(SBT_RSM_ATTR_STORE),aInXML: inXML, aOutXML: nil,forScanner: Int32(scannerId))

if (result == SBT_RESULT_SUCCESS) {
    // TODO: Process successful operation
}
else {
    // TODO: Process error
}
// Create XML string to set the value of attribute id (2053) to 1 of scanner ID 3.
NSString *xmlInput = [NSString stringWithFormat:@"<inArgs><scannerID>%d</scannerID><cmdArgs><arg-xml><attrib_list><attribute><id>%d</id><datatype>B</datatype><value>%@</value></attribute></attrib_list></arg-xml></cmdArgs></inArgs>",3, 2053,"1"];

// Store the value to enable the virtual tether alarm on the scanner id 3.
SBT_RESULT result = [apiInstance sbtExecuteCommand:SBT_RSM_ATTR_STORE aInXML:xmlInput aOutXML:nil forScanner: scannerId];

if (result == SBT_RESULT_SUCCESS) {
    // TODO: Process successful operation
}
else {
    // TODO: Process error
}