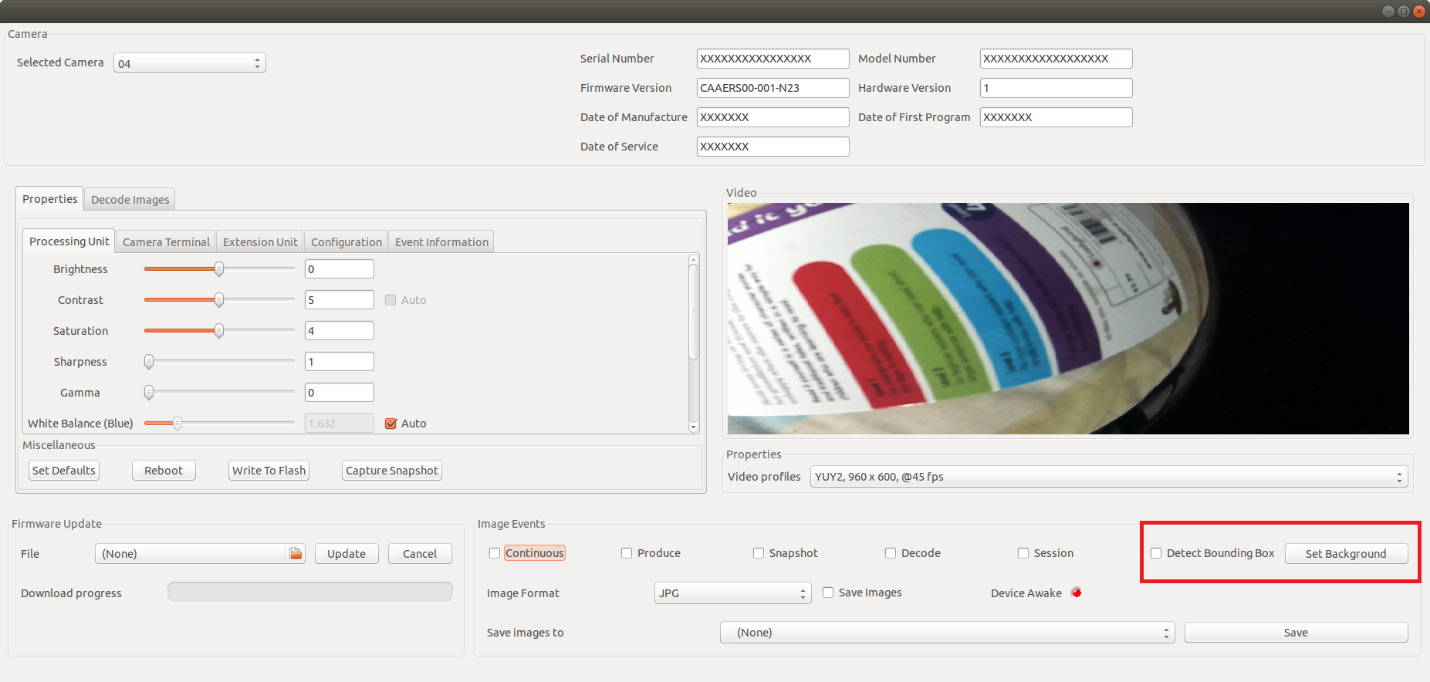
 Figure 1 Bounding Box Detection
In the GUI, a ‘CheckBox’ is provided for the user to enable/disable the bounding box feature. Once enabled, every time an object is held in front of the camera, a box will be drawn around it in the UI. In the Sample App, the first video frame is considered as the, ‘background’ that is used for comparison with all the other consecutive frames. Bounding box is detected based on the difference observed during the video frame comparison. User may choose to set the background manually by clicking on the ‘Set Background’ button as well. Once the ‘Set Background’ button is pressed, the particular video frame at that point will be considered for comparison purpose.
Below is a brief description of the inner functionality of the Bounding Box implementation.
The file ‘camera_bounding_box_factory.h’ should be included in the .cpp file in which the bounding box functionality is implemented.
First, a pointer of the ‘CameraBoundingBoxDetectorInterface’ is defined.
CameraBoundingBoxDetectorInterface* frameProc;
Next, a vector is defined to hold information relevant to the Bounding Box.
vector<BoundingBoxPoint> bounding_rect;
‘bounding_rect’ is used to contain information of the left bottom coordinates, width and the height of the bounding box. With the following code lines, initialization of the ‘frameProc’ takes place.
frameProc = CameraImageProcessingFactory::CreateBoundingBoxDetector(BackgroundFilterType::kStatic);
As the ‘BackgroundFilterType’, user may use ‘kStatic’ , ‘kDynamic’, ‘kDynamicGaussian’. But for continuous detection of bounding box, filter type ‘kStatic’ should be used.Initially it is required to capture a snapshot from the camera without any objects in the fore front. This image is considered as the Background frame that gets compared with every frame that comes next to check if a movement has occurred. If a movement is detected, the object that caused the movement is identified and a rectangle is drawn surrounding it. The method ‘SetBackgroundFrame’ should be called to set the Background for comparison. Before passing parameters to ‘SetBackgroundFrame’, the image that is displayed in the GUI needs to be converted to either a BMP or a JPG image. The conversion can be achieved by the following code lines.
std::vector<uint8_t> data = Encode(zebra::image::FileConverter::RGB_TO_BMP, image);
‘&data[0]’ and ‘data.size()’ are the converted image data and the converted image size respectively.’0’ or ‘1’ should be given if the image type is BMP or JPG respectively. Then the converted image data is provided to the ‘SetBackgroundFrame’ method.
frameProc->SetBackgroundFrame(&data[0], data.size(),image_width_, image_height_,0);
Full description of the method is provided below.
- Sets the background frame (call with first frame / frame to reset background)
- background_frame_buffer : background frame buffer
- length : length of background frame buffer
- image_width: width of background frame
- image_height: height of background frame
- image_type: type of background frame (reserved : 0:BMP,1:JPEG)
virtual void SetBackgroundFrame(BYTE* background_frame_buffer, int length, int image_width, int image_height , int image_type) = 0;
After setting the Background, ‘DetectBoundingBox’ method needs to be called. ‘DetectBoundingBox’ method accepts image file type as its first argument. Hence it is required to do an image conversion before passing parameters to the method.
std::vector<uint8_t> data = Encode(zebra::image::FileConverter::RGB_TO_BMP, image);
An RGB image is displayed when the Sample App is run. In order to call the ‘DetectBoundingBox’ method, the said image needs to be converted to BMP or JPG.
bool rect_found = frameProc->DetectBoundingBox(&data[0], data.size(), image_width_,image_height_,0,bounding_rect);
Full method definition is explained below.
- Detects the foreground object bounding box in the specified frame
-
- input_frame_buffer : input image buffer
- length : length of input frame buffer
- image_width: width of input image
- image_height: height of input image
- image_type: type of input image (reserved : 0:BMP,1:JPEG)
- bounding_rect : output bounding box location point array
- return value : returns true if bounding box found
virtual bool DetectBoundingBox(BYTE* input_frame_buffer, int length, int image_width, int image_height,int image_type, vector &bounding_rect) = 0;
When the above method returns ‘True’, ‘bounding_rect’ vector gets filled with values needed to draw the rectangle on the GUI to represent the bounding box.
float x_pos = (float)bounding_rect[0].x;
float y_pos = (float)bounding_rect[0].y;

float rect_width = (float)bounding_rect[3].x - (float)bounding_rect[0].x ;
float rect_height= (float)bounding_rect[3].y - (float)bounding_rect[0].y;
Information such as x, y coordinate of the left bottom of the rectangle, width and the height of the rectangle is provided by the vector ‘bounding_rect’. This in turn can be used to draw a rectangle using wxWidgets.
Video Profile Property
Video Profile property drop down is populated at the beginning with a call to GetSupportedFrameTypes(). Based on the user choice, video profile of the camera is changed using SetCurrentFrameType(..). The way in which this can be achieved is shown in the code snippet given below.
void SetCurrentFrameTypeTest(std::shared_ptr<zebra::camera_sdk::ZebraCameraClient> camera)
{
    std::vector<zebra::camera_sdk::FrameType> data = camera->GetSupportedFrameTypes();

    for (size_t i = 0; i < data.size(); i++)
    {
        std::cout << (int)data[i].format << "," << data[i].width << ", " << data[i].height << "," << data[i].framerate << std::endl;
    }

    if (data.size() > 1)
    {
        int i = 1;
        camera->SetCurrentFrameType(data[i]);
        std::cout << (int)data[i].format << "," << data[i].width << ", " << data[i].height << "," << data[i].framerate << std::endl;
    }
}
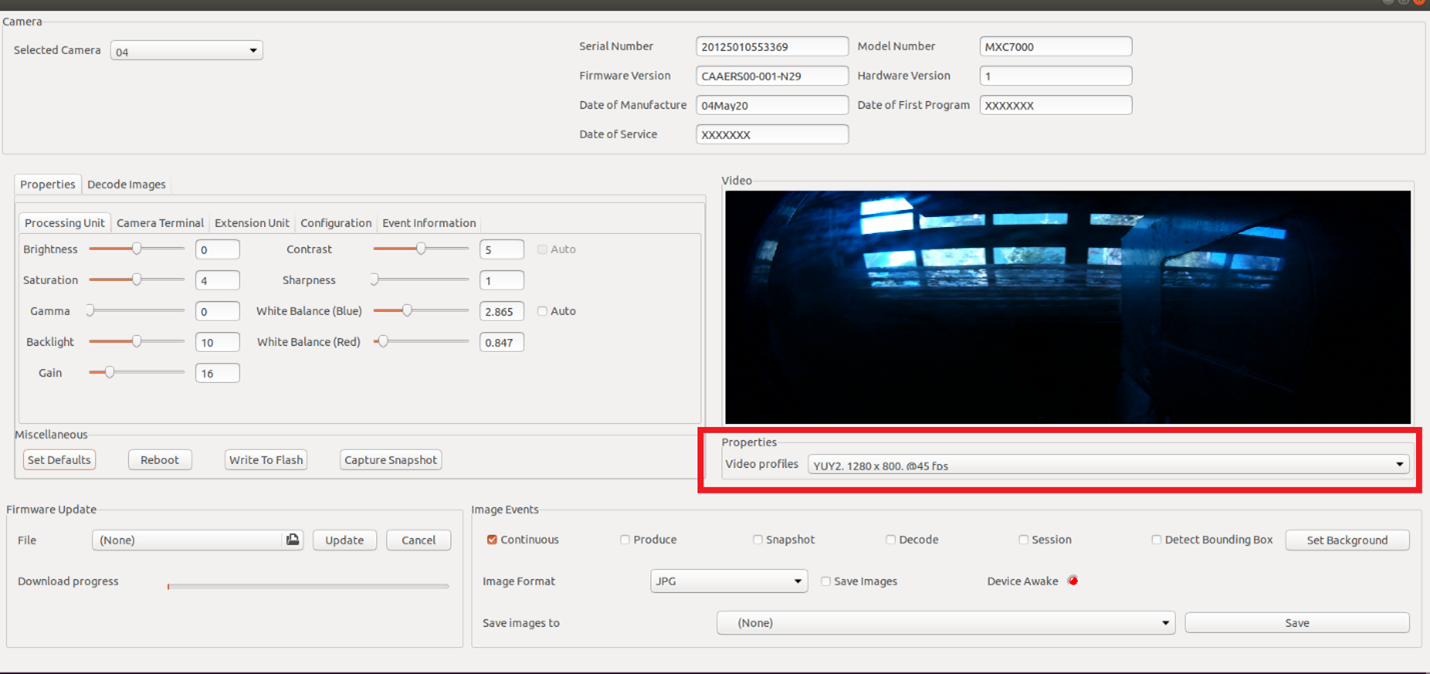 Figure 2 Video Profile Property
Using the drop-down menu shown above, user is able to select the desired Video Profile. Options available in the drop-down menu are as follows, YUY2 960 x 600 @45 fps, YUY2 1200 x 800 @45 fps, YUY2 480 x 300 @45 fps, YUY2 320 x 200 @45 fps.
With every selection, a message box is displayed in the Sample App to alert the user to perform a ‘Set Background’ again, which is a mandatory step required in Bounding Box feature. As explained in the previous section, Bounding Box feature operates with a comparison between the set Background frame and the incoming video frame. For the comparison to be successful, both frames should be of the same video profile. Hence with every change of video profile, Background frame has to be reset, if the user desires to make use of the Bounding Box feature.
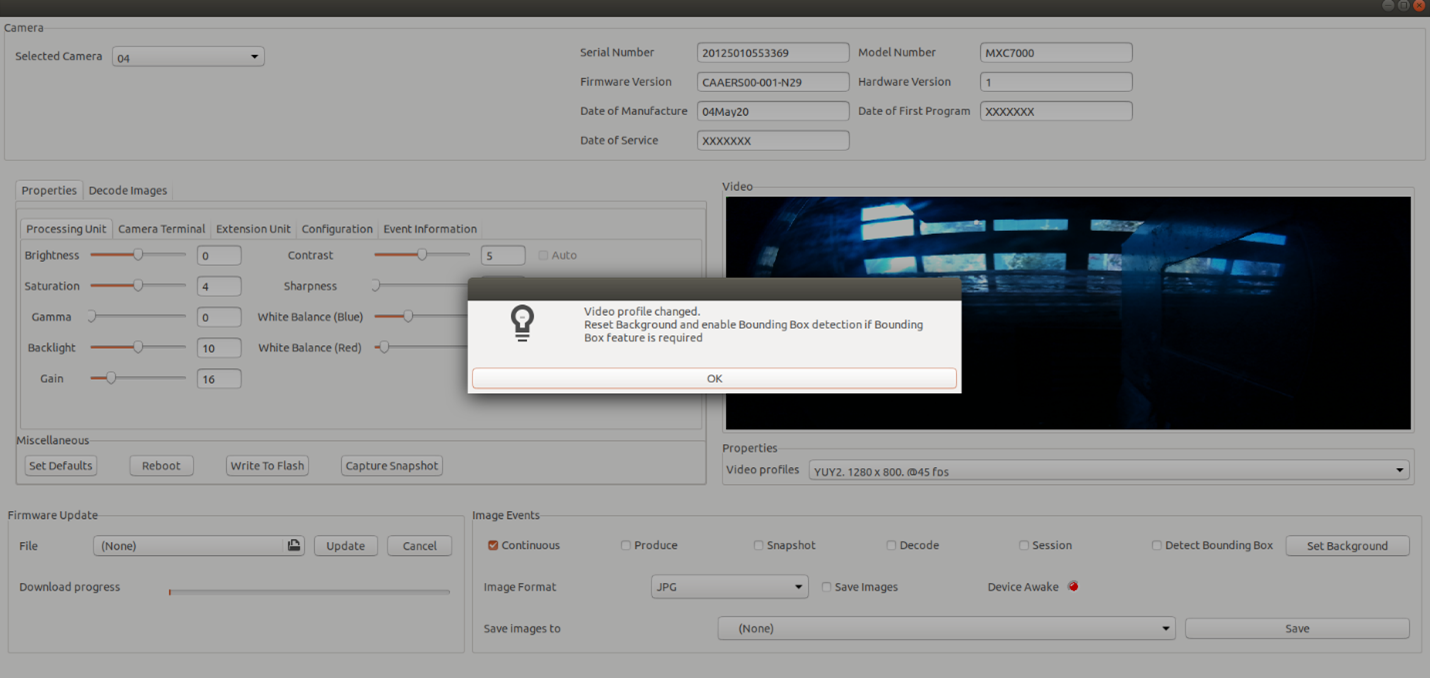 Figure 3 Video Profile Property Changed
Also, options available in the drop down would vary depending on the USB ports used to connect the camera and the scanner cables. For instance, more options will be present in the drop-down menu when connected to USB 3.0 port than when connected to USB 2.0 port.