


One of the features of the EMDK is the ability to create Barcode scanning profiles. This application allows you to modify a Barcode profile to select which times of Barcodes should be interpreted.
Note: Although this sample may work with previous versions of the EMDK, it is advised to update the EMDK runtime on your device before loading this sample.
Android API 19 must be installed via the SDK Manager before attempting to load this sample.
The following guide will walk you through setting up the EMDK samples in your IDE.
1) When the application first loads you will see:
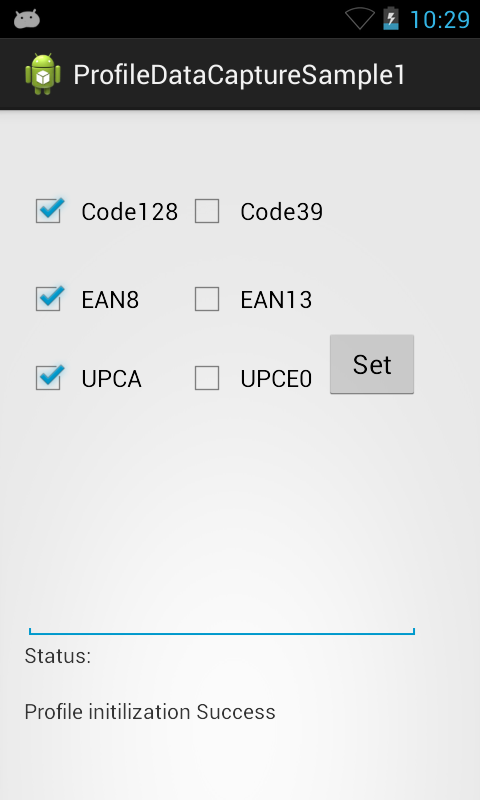
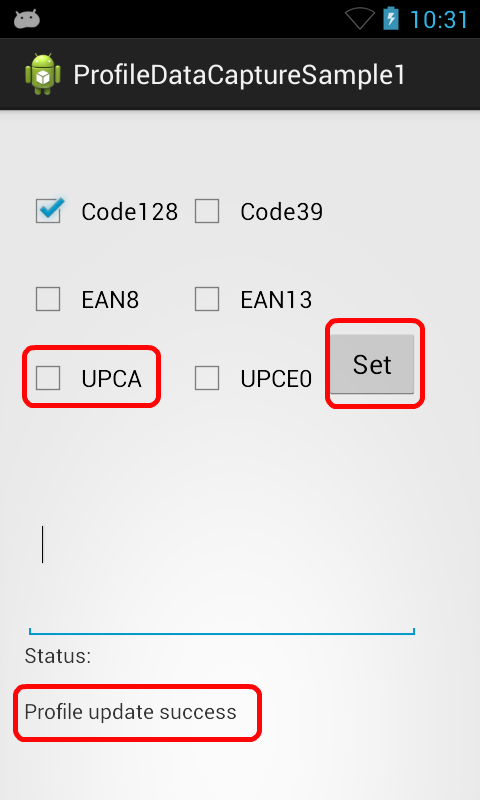
2) Select which Barcode types you would like to enable.
3) click "Set".
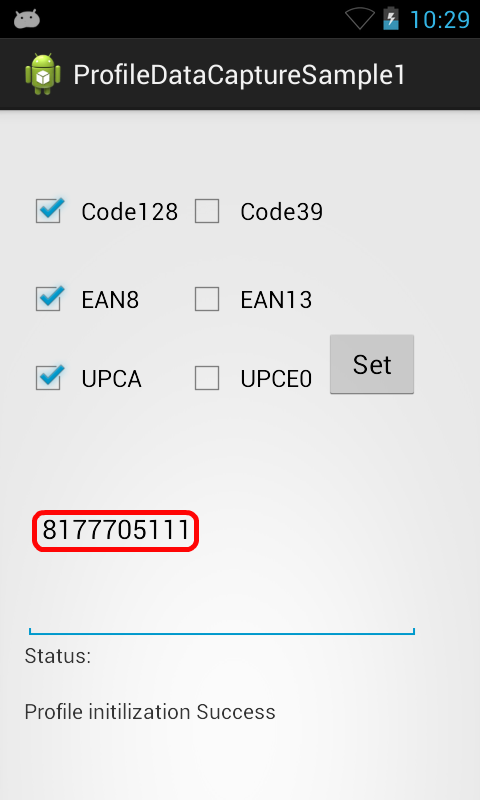
4) San a Barcode of one of the selected Barcode types.
5) The data from the Barcode should populate on the screen.
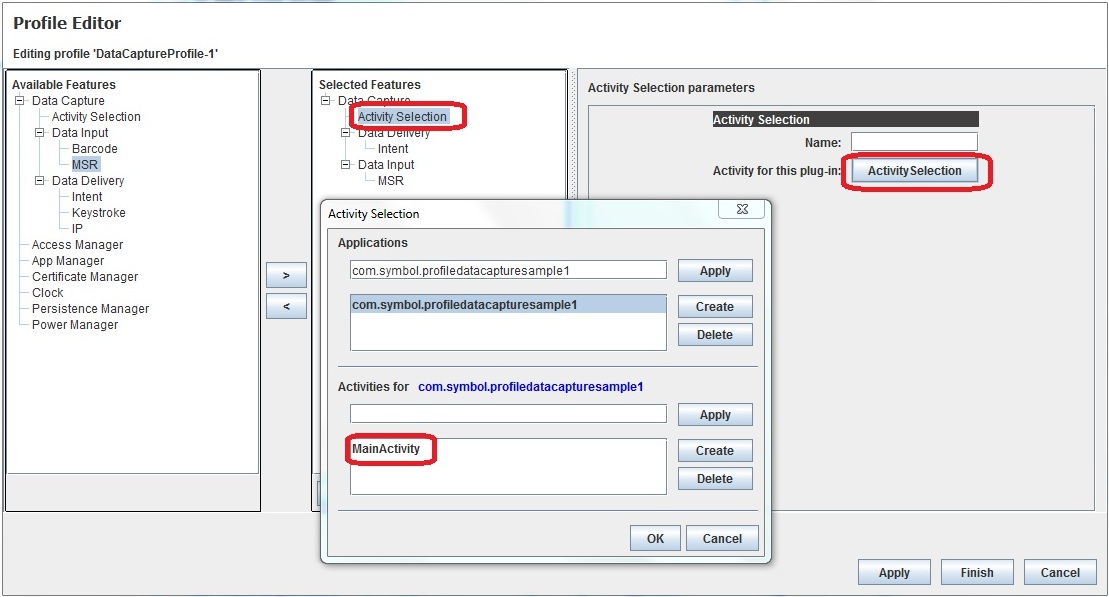
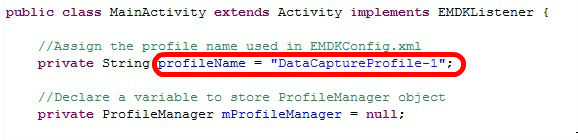
Using the Profile Manager Wizard, a profile called 'DataCaptureprofile-1' was created. You can inspect the parameters it has by launching the EMDK Profile Manager.

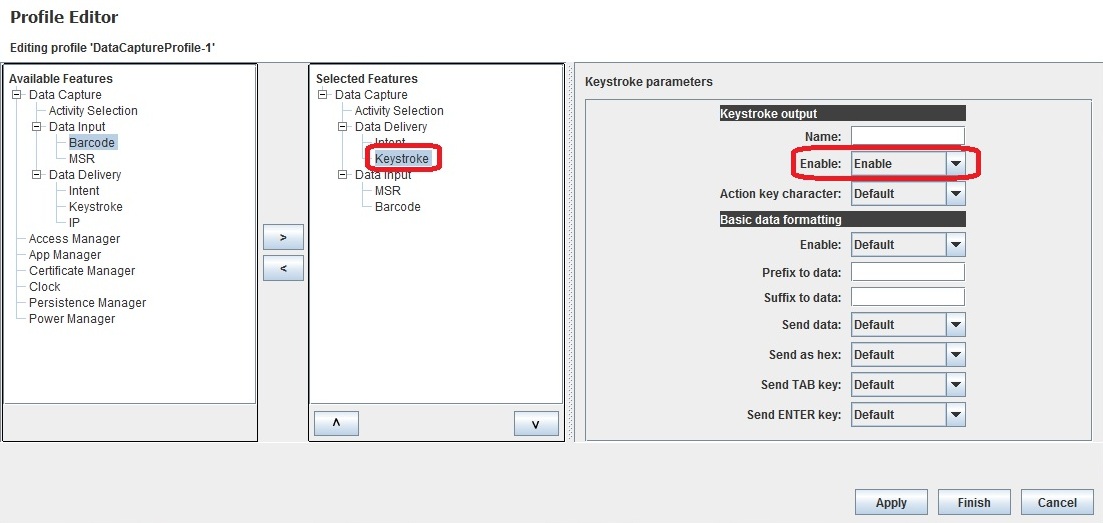
You will see that the MainActivity for the application has been selected to indicate when this profile will be used. As you can see in EMDK for Android V 2.1, the existing features of V 2.0 are categorized based on their operations such as Activity Selection, Data Input (Barcode, MSR) and Data Delivery (Intent, Keystroke and IP). Moreover it has introduced several new MX (Mobility Extension) features (Ex. Clock, App Manager, Power Manager etc). These MX features are used for configuring Symbol Android devices.
Note: The field "Name" contains user defined name to identify a particular feature. This is required when editing any specific feature programmatically, which is outside the scope of this tutorial. So we will keep the "Name" field empty.
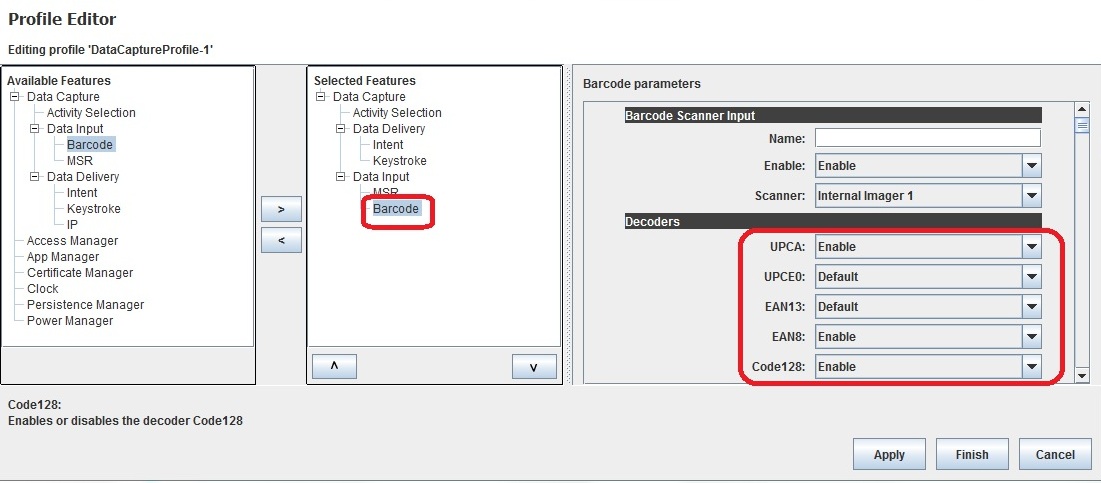
Note: The field "Name" contains user defined name to identify a particular Barcode Scanner Input feature. This is required when editing any specific Barcode Scanner Input feature programmatically, which is outside the scope of this tutorial. So we will keep the "Name" field empty.
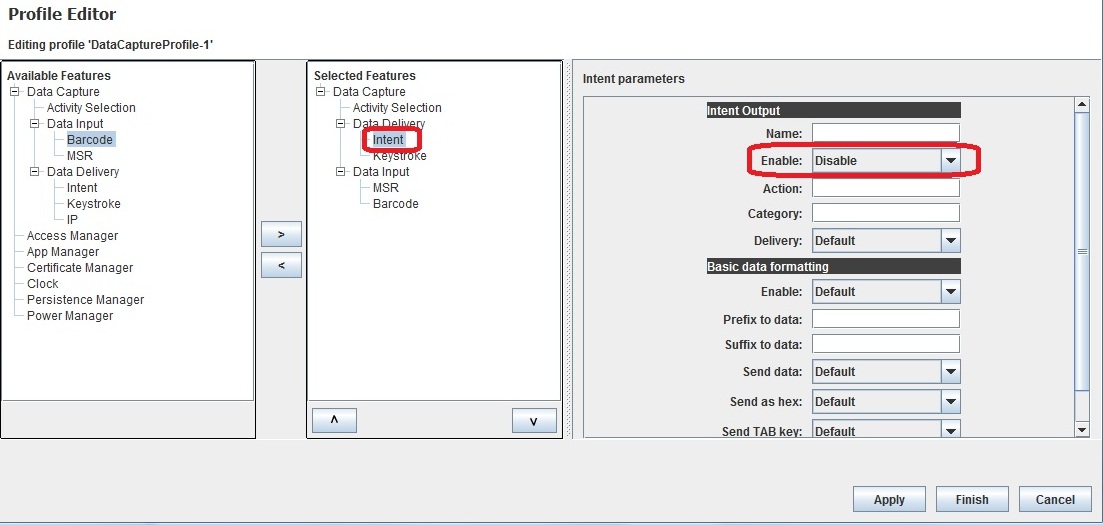
The profile feature parameters that have been chosen can be inspected to see that certain barcode decoders have been enabled and the output will be using the Keystroke feature. This profile has MSR and Intent output disabled.
When the application starts up, the onOpened method is executed and the profile is processed.
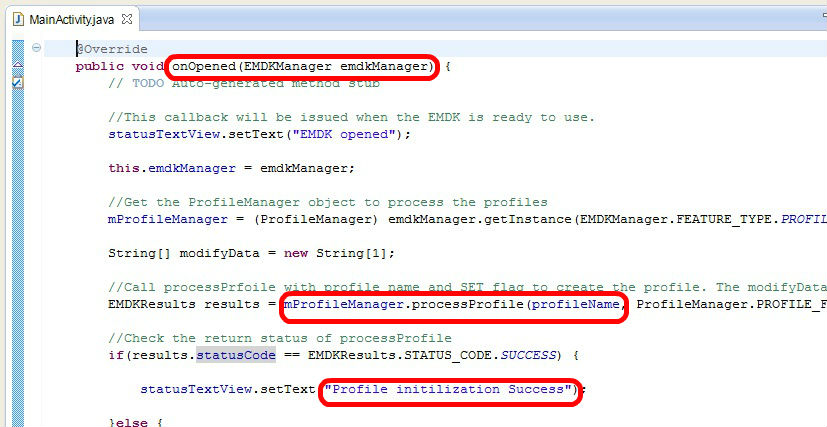
It if was successful, you will see "Profile initialization Success" on the application's status area.

After the application has been loaded, you can begin scanning barcodes. Notice that only Code128, EAN8, UPCA types have been chosen. When you press the scan trigger on the device, you should see the default scanner become activated and a barcode is attempted to be read. If the barcode you have chosen is not one of the ones listed above, it will not decode and display in the text area.
NOTE: Most everyday items you may have in your home use the UPCA type barcode. You may also Google these types of barcode to see what they look like and print one out for testing
Upon successful Barcode scanning, the barcode data will be output into the text field.

When you uncheck the checkboxes in the application, the DataCaptureProfile-1 is modified on the fly using the ProfileConfig API.
Now when you scan the same Barcode, you will still see the barcode aimer but the data will not be decoded and you will not see the data displayed in the text area.