Introduction
This guide describes how to use StageNow to select and process a StageNow barcode, NFC tag or binary (.bin) file from a USB or SD card storage, which configures target device(s) as desired for an organization and/or persists a settings Profile on the device(s) for later consumption (following an Enterprise Reset, for example).
IMPORTANT:Use this guide only after one or more Profiles have been created.
Also see:
- Trusted Staging Guide | Securing devices and the ability to configure them
- Dynamic Staging Guide | Injecting values from a file into device configurations at staging
- Bypassing the Android Setup Wizard | Applies to devices with MX 9.0 or later
Stage a Device
I. Select a Staging Profile
To select a profile with which to stage the device:
On the host computer, select the StageNow icon from the Start menu to open the Workstation Tool. The Staging Operator home screen appears. See Home Screen for field descriptions.
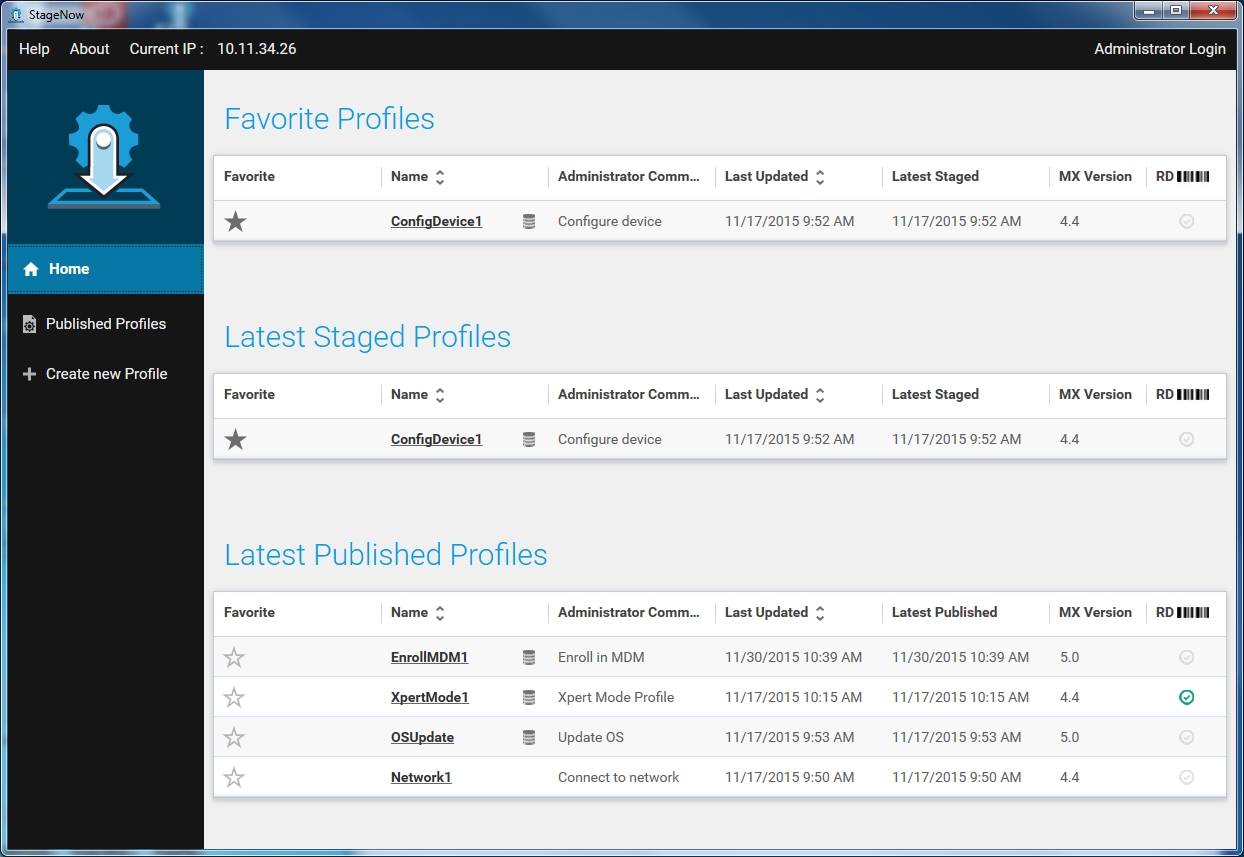
Select a profile with which to stage the device(s).
II. Select Staging Medium
Barcode, NFC or USB/SD Staging
This method of staging writes the configuration information from the selected profile into barcodes, NFC tags or USB/SD card storage. Staging is initiated when the output is read by the client device(s).
Select the desired medium (Barcode or NFC) tab:
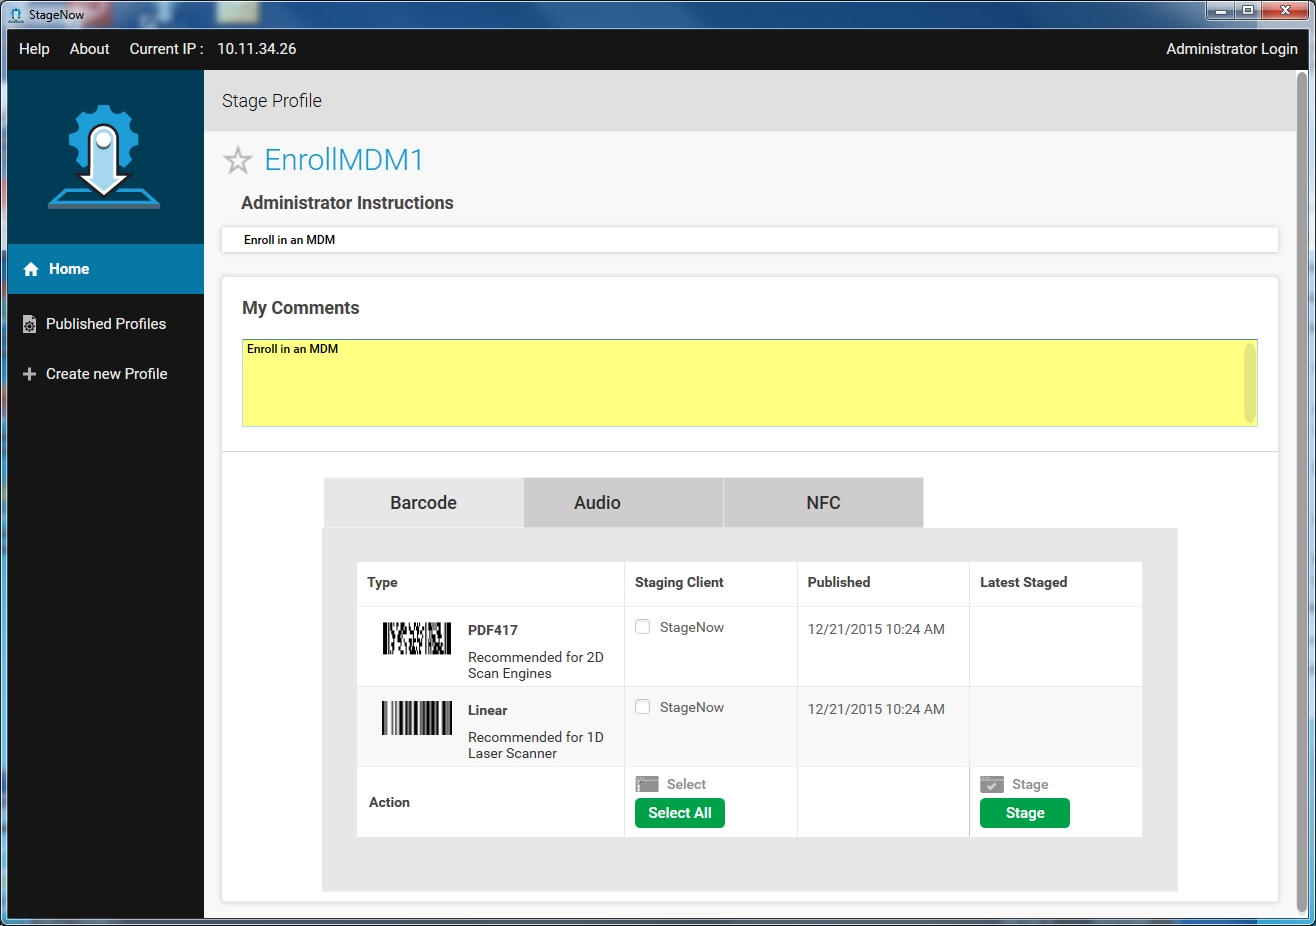
Optional: In the "My Comments" field, enter comments or special instructions to be displayed to the staging operator when staging begins.
Select the desired output type (if applicable) or choose "Select All" to select all supported output types.
Select Stage to generate a PDF of the staging material.
<img alt="image" style="height:350px" src=""/>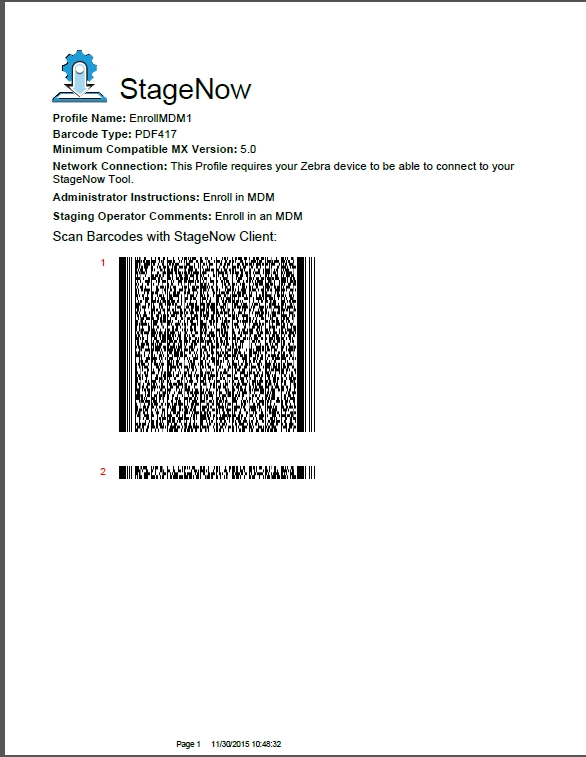
III. Stage the Device(s)
On the target device, tap on the StageNow icon to launch the StageNow Client.
Note: The StageNow Client requires the DataWedge profile to read barcode data. However restoring DataWedge discards the current StageNow configuration. If StageNow cannot scan barcodes after restoring DataWedge, exit and re-launch the StageNow Client on the device.
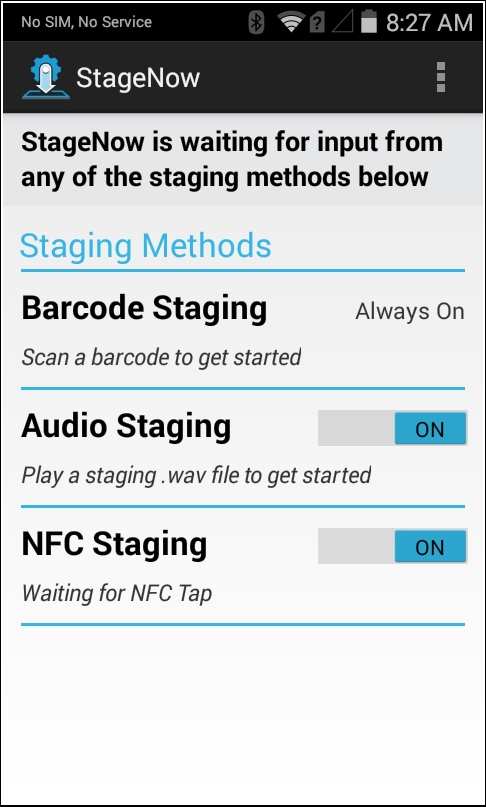
The application lists the available staging methods.
Note: MC40 devices do not support NFC.
Barcode Staging
To deploy the selected profile to the device through staging barcodes:
The Barcode Staging option is always on. Scan the barcode(s) printed from the StageNow Workstation Tool.
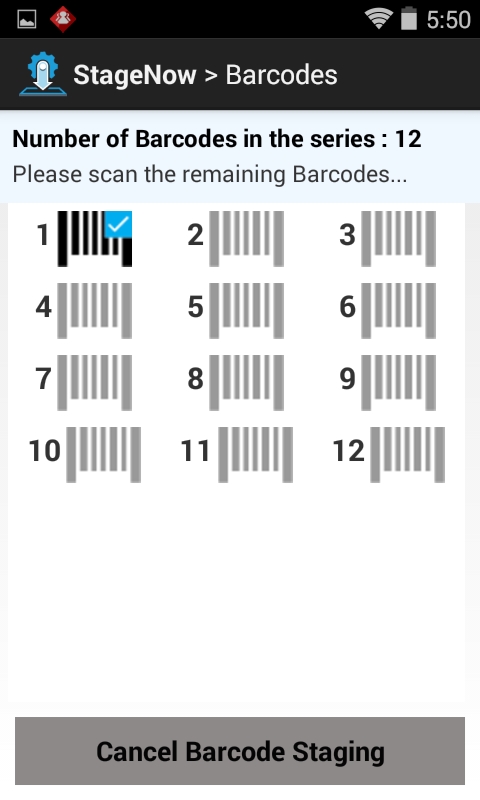
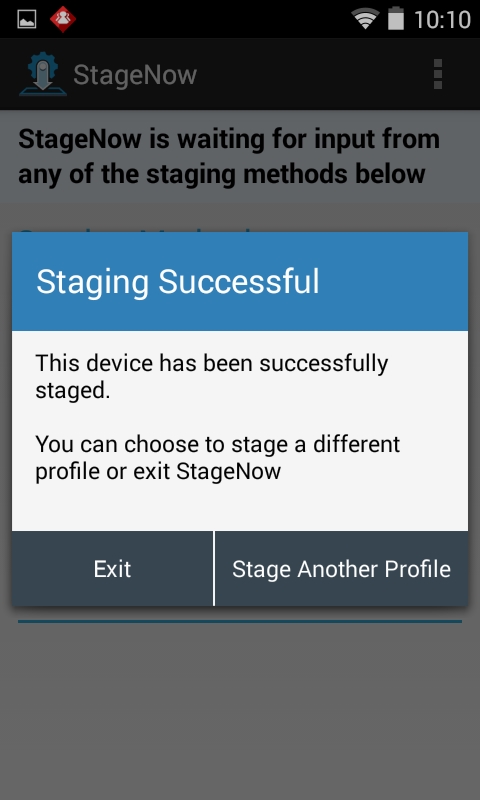
The screen indicates the barcodes scanned via a check mark, and the barcodes left to scan. Continue scanning all staging barcodes. Upon successful deployment, the device displays the following screen:
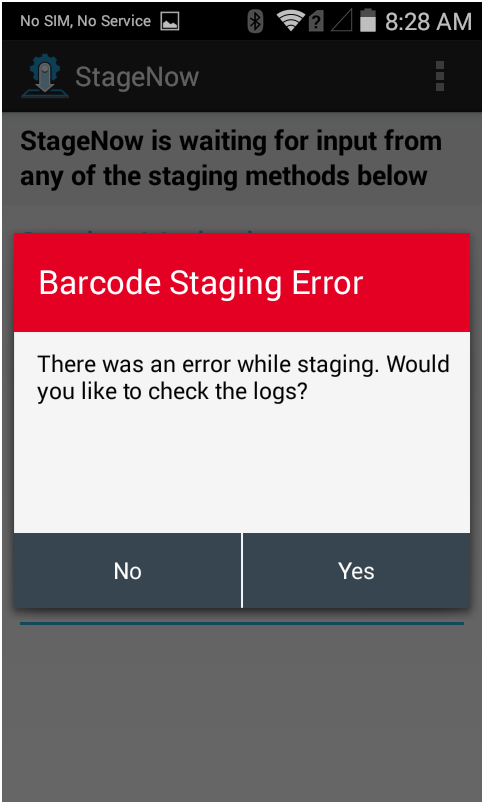
If errors occur during deployment, the pop-up shown below is displayed. Select "Yes" to view logs for troubleshooting.
NFC Staging
To prepare for NFC staging, the StageNow Workstation tool is used to create a .bin file that contains the staging instructions. The .bin file can be created from a new or existing device-settings Profile using instructions above. For more information about creating .bin files, see the Staging Profiles guide.
Requirements
- Zebra device(s) equipped with an NFC reader
- A Zebra device emulating an NFC card
Emulation Process
After the .bin file is created, Zebra recommends NFC card emulation for staging. A summary of the process is below, followed by a link to the full instructions.
- Push the
.binfile to a Zebra device. - Open the
.binfile using the StageNow app's Card Emulation feature. - Tap that device (which is now emulating an NFC Card) onto one or more Zebra devices to be staged.
- Observe staging and check for errors.
Go to the full NFC Card Emulation instructions.
Staging with NFC tag
On the device to be staged, open the StageNow Client and confirm that NFC Staging is enabled:

Touch the device to the fully programmed NFC tag. After a moment, the following screens appear:
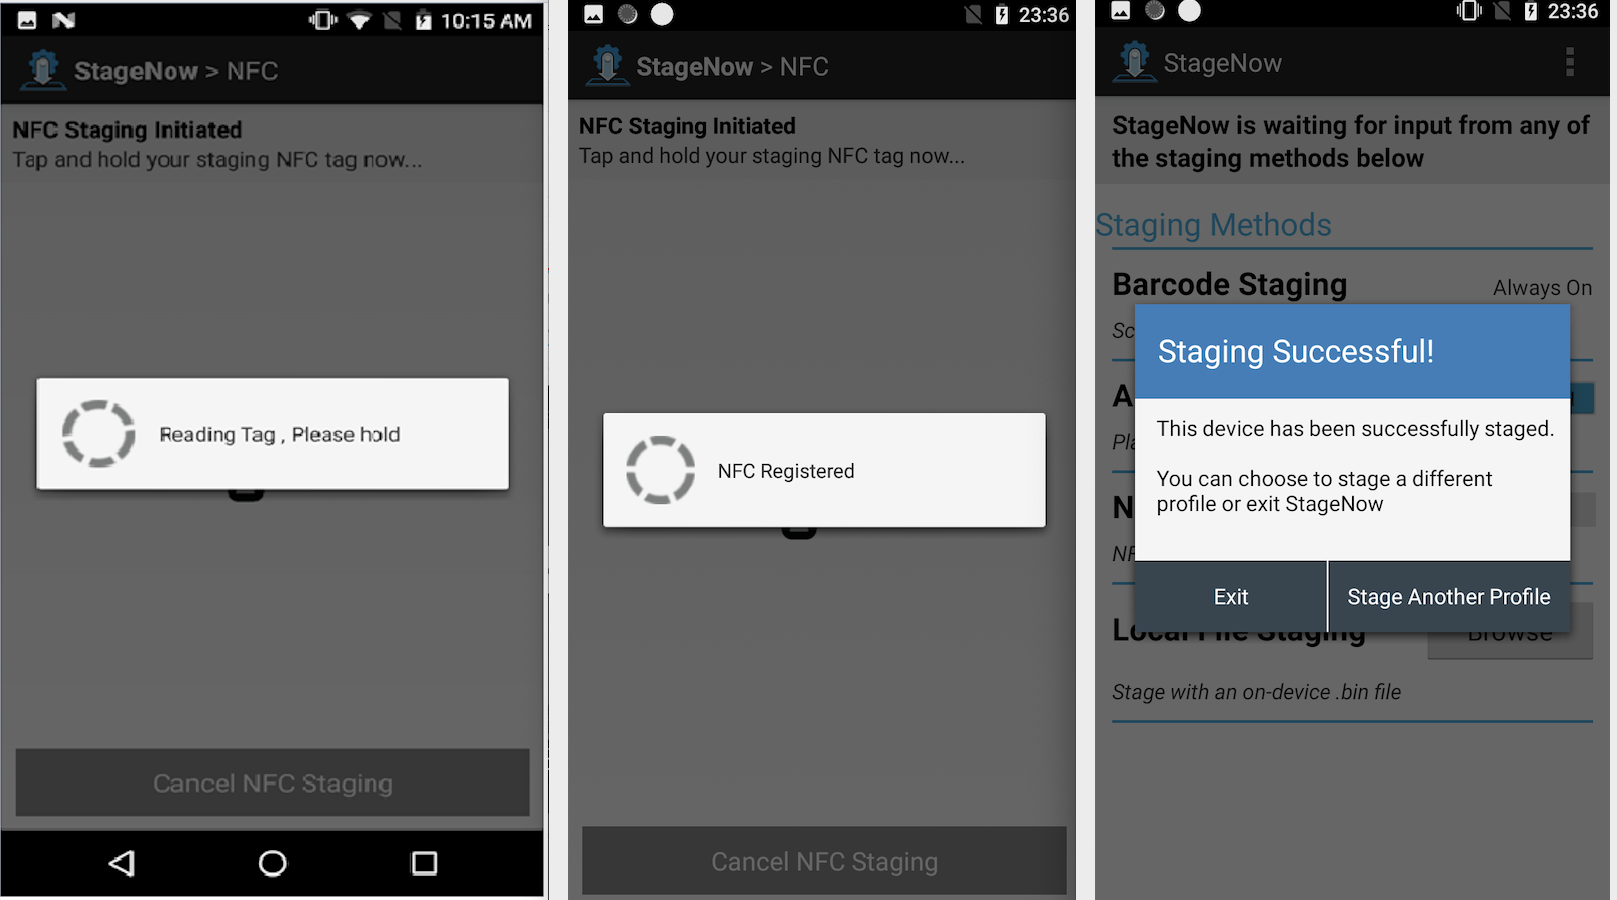
Follow prompts to complete staging deployment.
NFC Staging is complete.
For devices NOT equipped with an NFC reader, use the USB / SD Card Staging instructions below to stage from a .bin file.
USB / SD Card Staging
StageNow allows the .bin file(s) generated during the NFC Staging process to be used for staging a device from a USB drive or SD card.
To automatically stage a device from a USB drive or SD card:
- Generate
.binfile(s) using the NFC Profile Staging procedures. - Create a folder called
/Stagenowon a USB drive or SD card. - Copy the
.binfile(s) to the new folder's root level. - Attach (or insert) the storage device and boot the (new or enterprise-reset) device to be staged.
IMPORTANT NOTES:
- On devices with MX 9.0, any
.binfile causes Setup Wizard bypass. - On devices with MX 9.1 and later, a security check ensures that bypass occurs only if the StageNow Profile was created using MX 9.1 or later.
- Devices with MX 9.1 (or later) automatically skip the Android Set-up Wizard and begin staging when a
.binfile is found. About SUW bypass limitations.
Note: Staging Profiles stored on an SD card take precedence over USB.
To manually stage a device from a file on the device:
- Generate
.binfile(s) using the NFC Profile Staging procedures. - Copy the
.binfile(s) to any location on the device. - Launch the StageNow client and tap the "Browse" button.
- Navigate to and tap the
.binfile copied in Step 2 to begin staging.
StageNow Errors
Client Menu
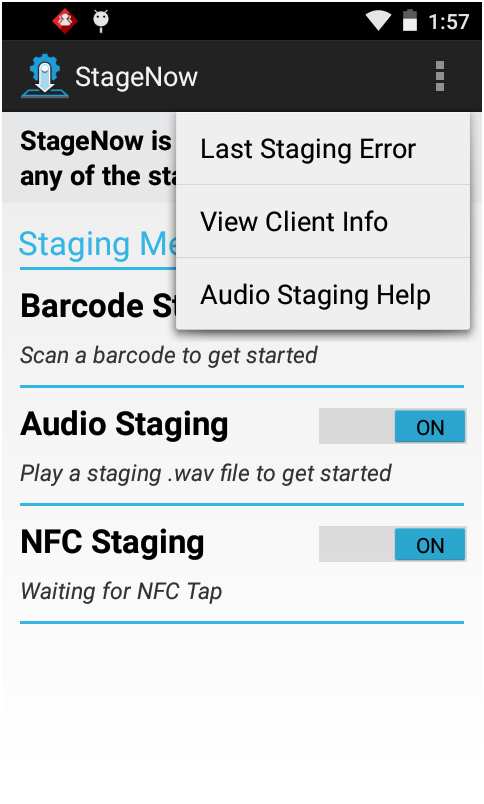
In the StageNow app, tap the at the top right of the window, then tap "Last Staging Error" from the menu.
Last Staging Error
If staging fails, a screen similar to the image below appears. To troubleshoot, review the log to determine the cause of the error by selecting "Yes" from the staging failure screen. To view the log later, select "Last Staging Error" from the StageNow Client menu.
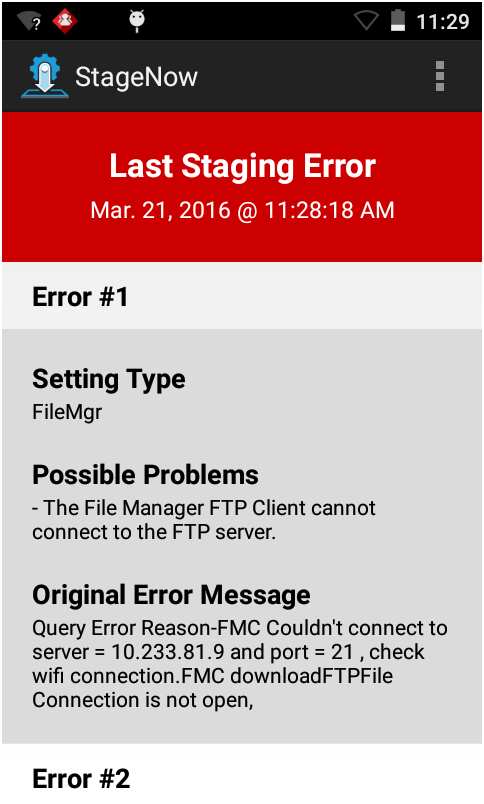
HINT: To identify the error(s) in the log, refer to the characteristic-error or parm-error in the log contents.
Note: The Last Staging Error screen displays content only if there are errors in the staging operation. If the staging operation is successful, this screen is empty.
Log Path
To configure the log file path, select the menu icon and select Log Path.
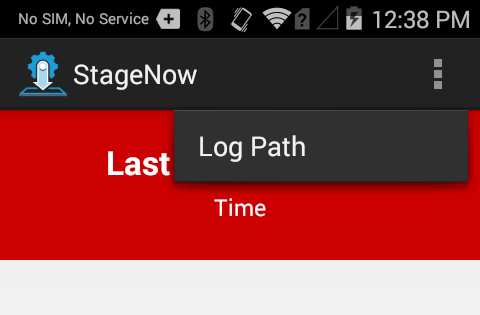
The Log Path window opens.
Enter the new path and select Done to update the path, or cancel to retain the existing path.
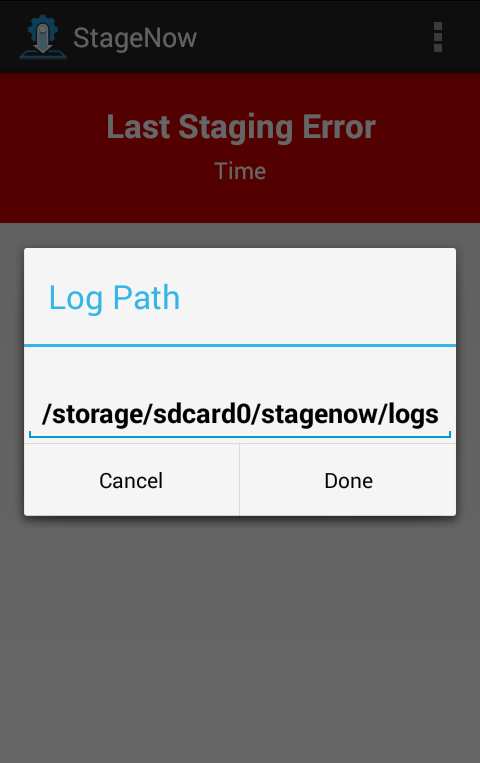
View Client Info
Select View Client Info to view software version information for the device.
Use this screen to determine whether the device has full or partial StageNow feature functionality.
Full Functionality - the OSx Version is the same as the MXMF Version.
Partial Functionality - the OSx Version is less than the MXMF Version. See the Feature Compatibility section of the specific Setting Types to determine if the device supports that feature.
No Functionality - no OSx Version.
Staging Wait Conditions
The following pop-up screens can appear during staging, indicating the device is performing an operation and that staging will complete when it is done.
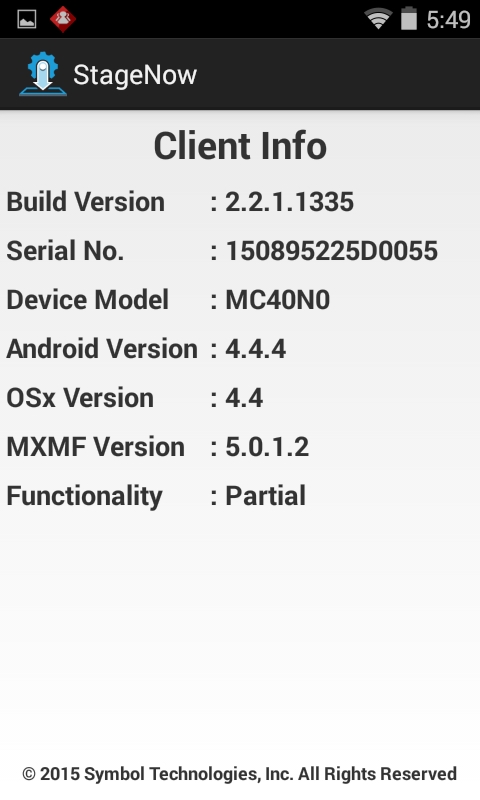
Initializing
Following a device reboot, Zebra components such as the MX Framework can require as much as two minutes to initialize and prepare for staging. If staging is initiated during this time, the StageNow Client indicates displays a pop-up similar to the image below:
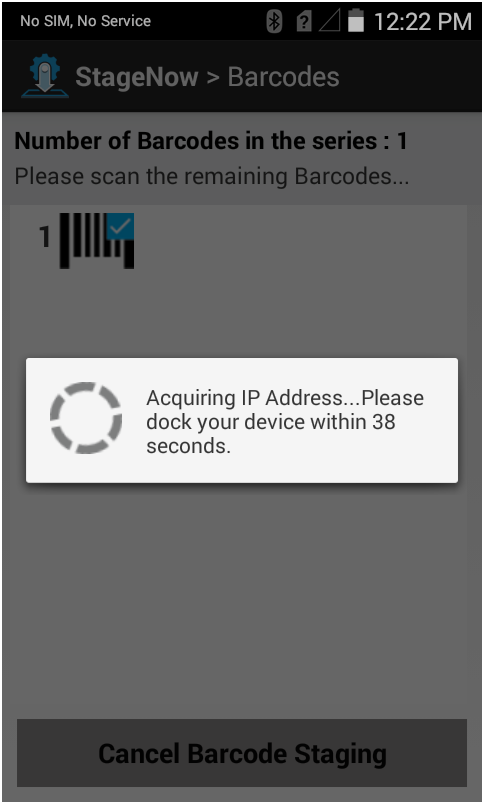
Acquiring IP
A delay can sometimes occur if staging requires an IP address, such as during "scan-and-dock," when the operator scans a barcode and places the device in an Ethernet cradle. Staging pauses until the device acquires the IP address and performs network operations such as downloading a file from the StageNow staging server. Under such scenarios, a pop-up appears similar to the image below:
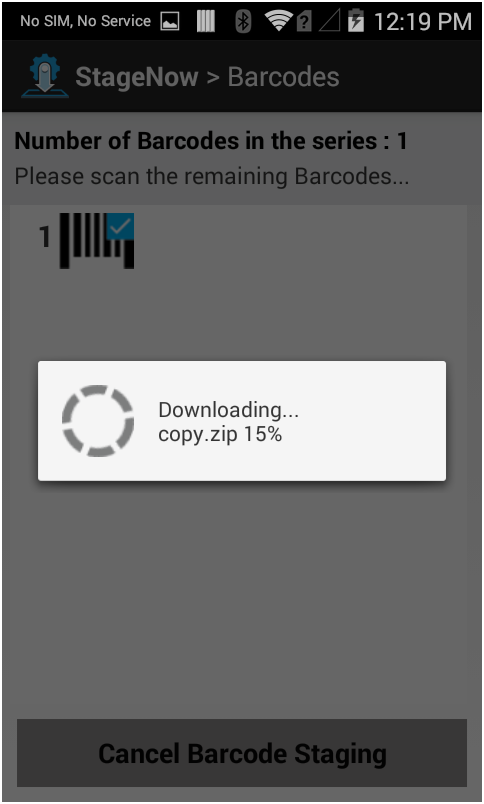
Downloading
The pop-up shown below indicates that the client is processing a staging profile that contains a command to download content from a staging server. This usually indicates that an OS update package is downloading.