Overview
This document describes how to set up macOS and Windows computers running Android Studio to work with Zebra's EMDK for Android software development kit. Android Studio enables Java developers to easily create powerful line-of-business apps for Android. EMDK extends Android Studio with tools to interface with and configure Zebra Android devices and their scanners, ports and other peripherals needed for data acquisition or other enterprise application requirements.
Prerequisites
The following software is required to use EMDK for Android:
Windows
- Windows 7, 8, 8.1, 10 (32- or 64-bit)
- Android Studio 2.2 or later
- A Java Development Kit (JDK)
macOS
- macOS 10.10.5 Yosemite or later
- Android Studio 2.2 or later
- A Java Development Kit (JDK)
IMPORTANT:Be sure to read and understand the licensing agreement for any selected JDK or SDK.
Install EMDK-for-Android Plugin
The following instructions apply to Android Studio, which is required to use EMDK for Android and must be installed to complete the steps below.
Install Android Studio before proceeding.
NOTE: Dialog boxes of macOS, Windows and Android Studio versions vary slightly.
Set up EMDK for Android:
Uninstall prior EMDK installations and related files, if any.
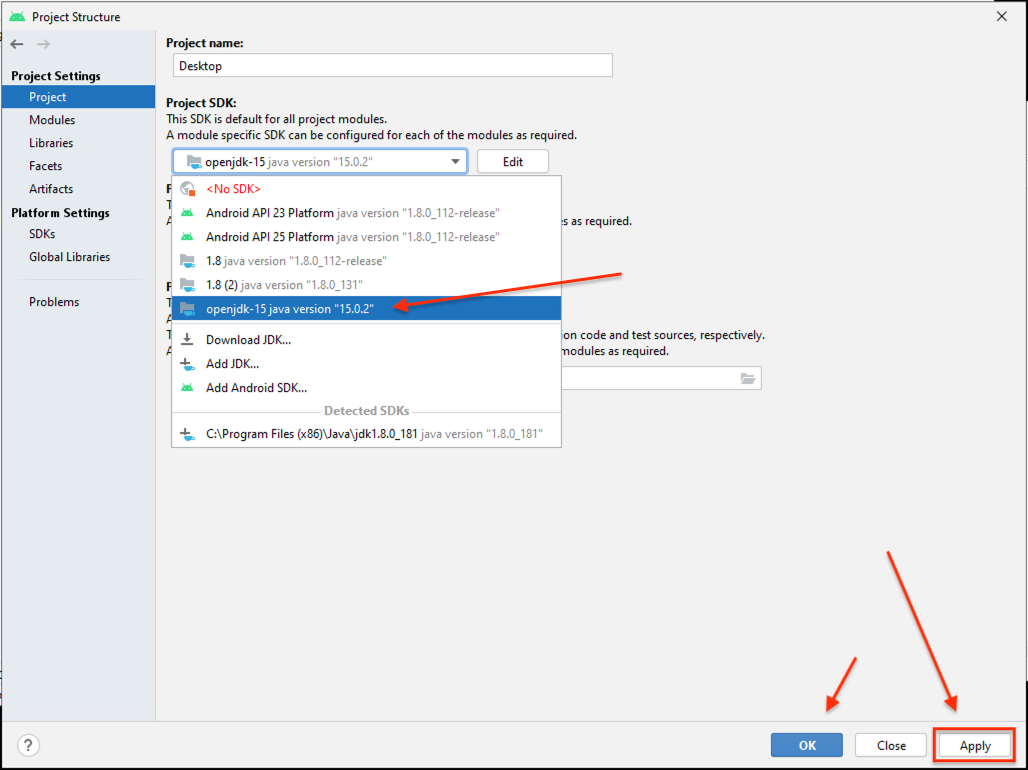
Select a Project SDK:
a. Open an Android Studio project (if not already open).
b. Select File -> Project Structure.
c. In the left-hand pane under Project Settings, select "Project" (if not already selected).
d. In the right-hand pane under "Project SDK," select an SDK from the drop-down or add or download one, as in the image below.
NOTE: The Android development community recommends using the latest OpenJDK.
 Click to enlarge; ESC to exit.
e. Click "Apply" and then "OK" to close.Install the EMDK for Android plug-in:
a. Go to Android Studio -> Preferences.
b. In the left-hand pane, select "Plugins" to show Installed Plugins and the Plugin Marketplace: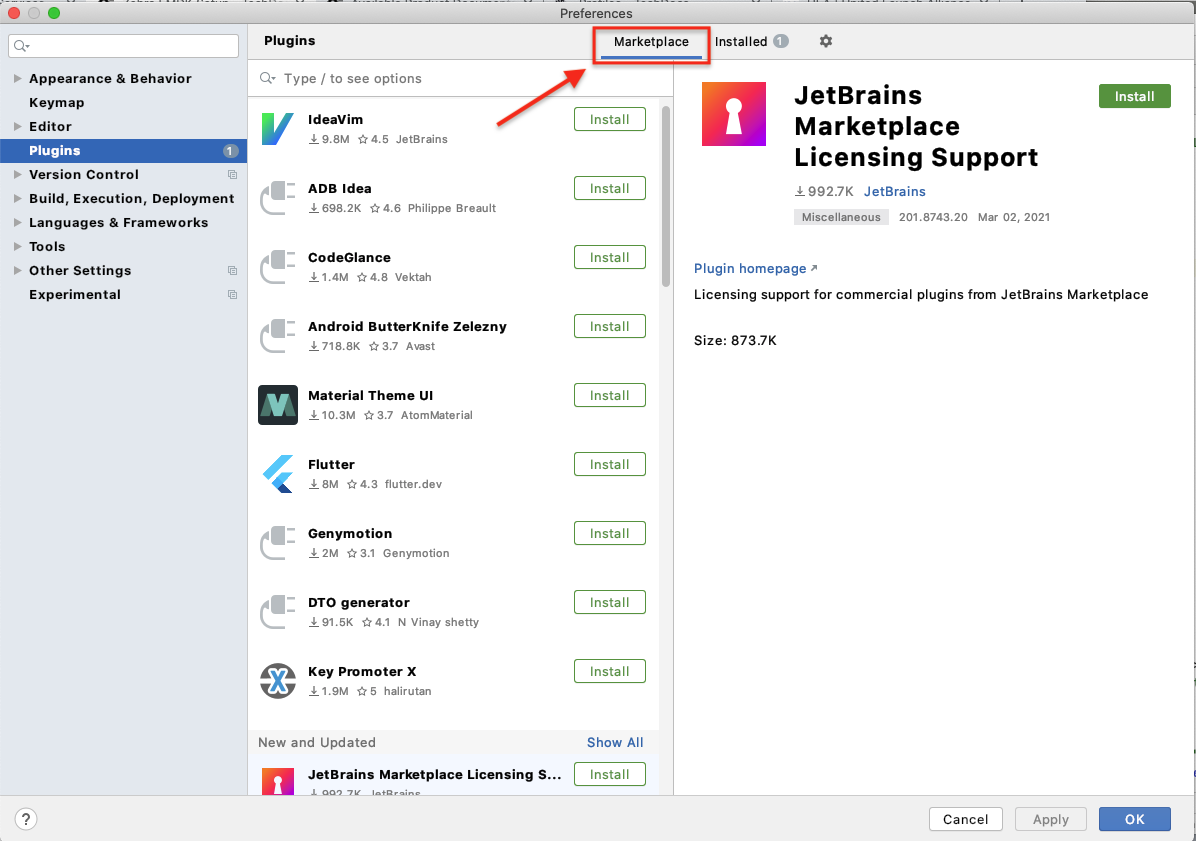 Click to enlarge; ESC to exit.
c. Click "Marketplace" (if necessary) to show available Plugins.
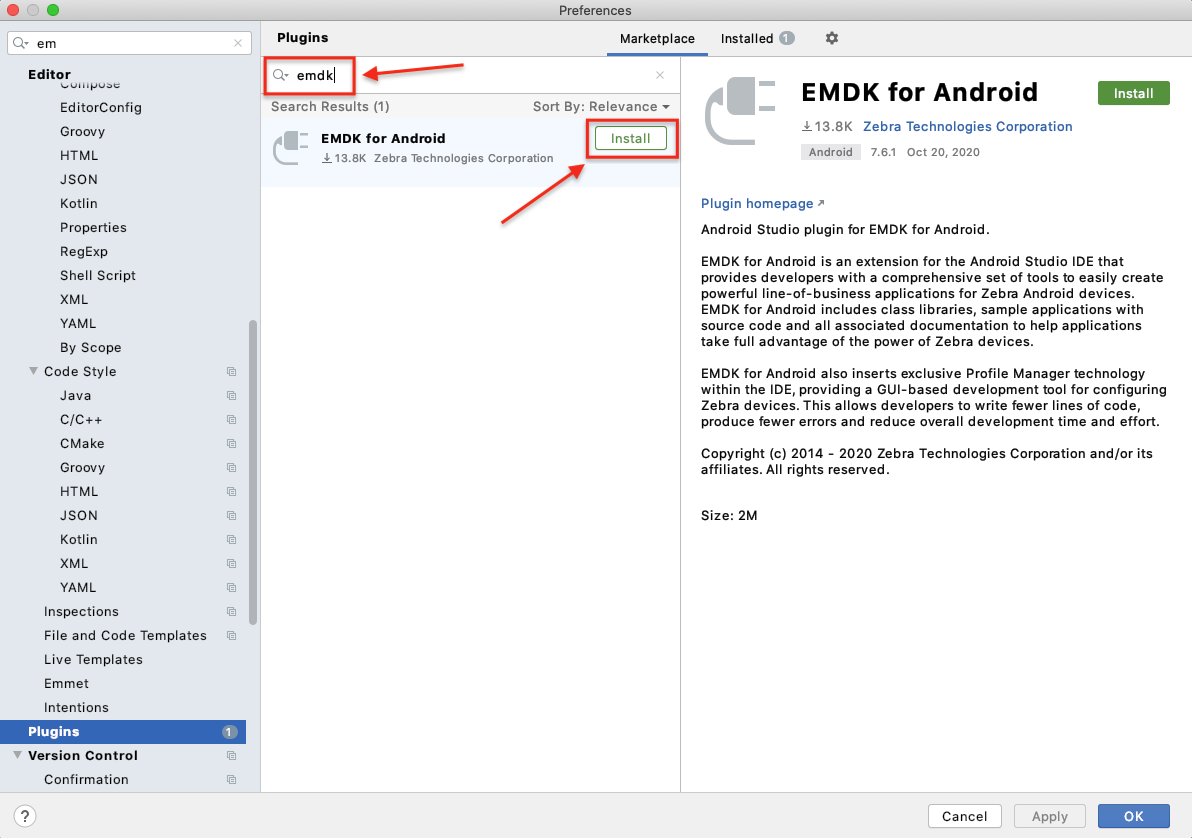
d. Enter "emdk" in the search box and hit ENTER.
e. Click "Install" button.
 Click to enlarge; ESC to exit.
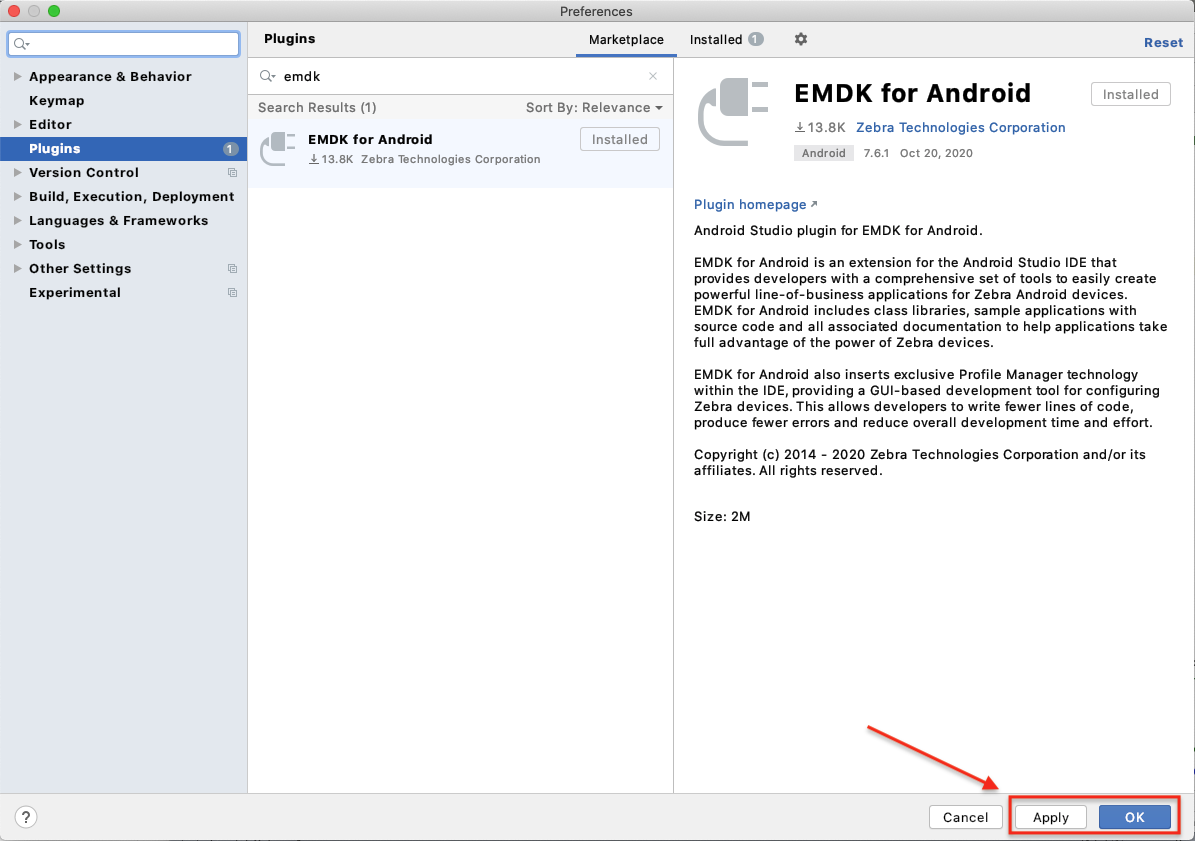
f. Click "Apply" to activate the Plugin, then Click "OK" to close.
 Click to enlarge; ESC to exit.
Enable the EMDK SDK:
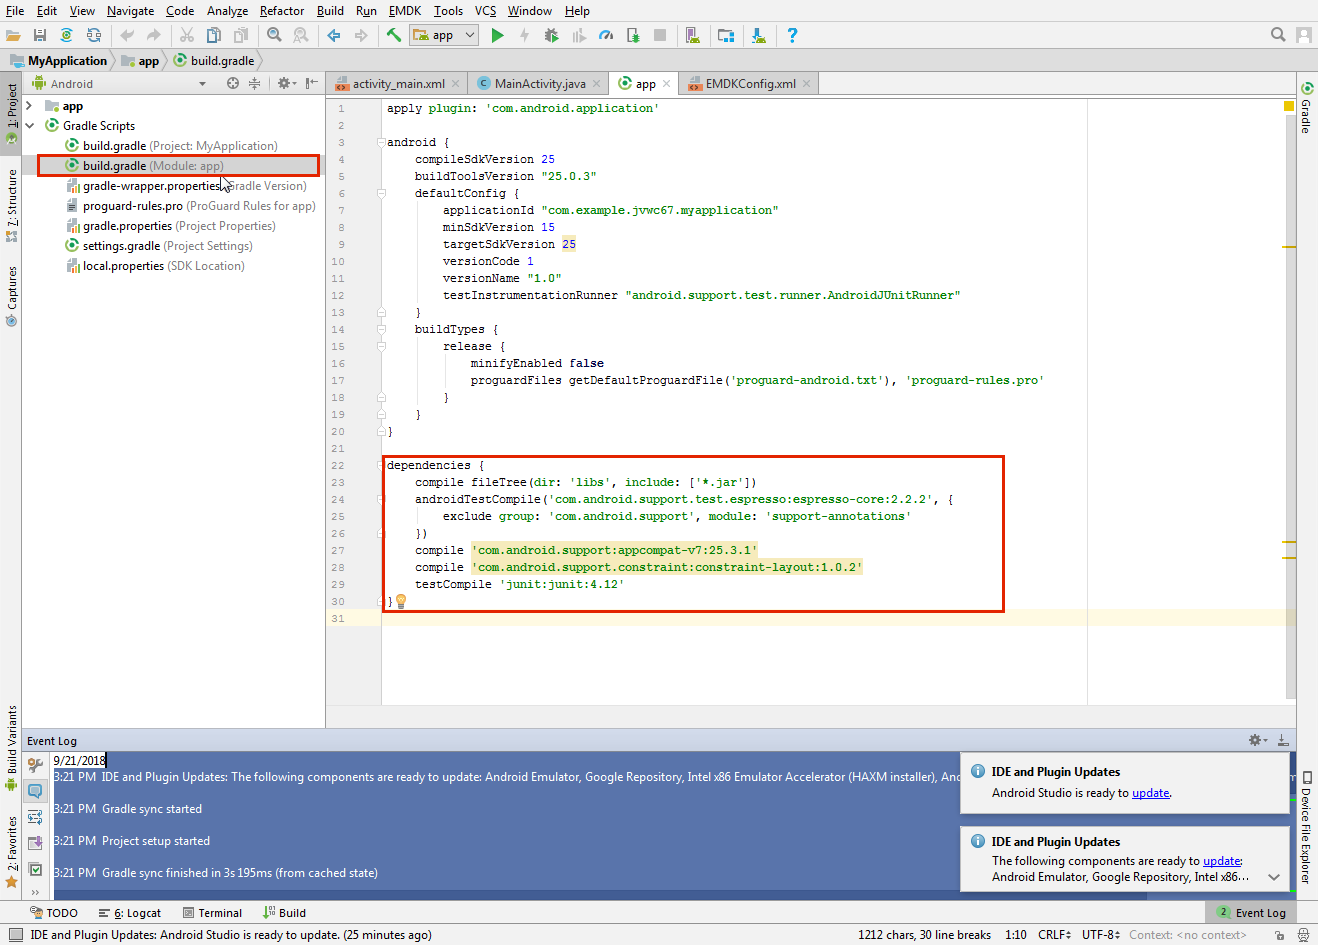
a. Go to the app module in the Android project in which to to use EMDK.
b. Navigate to thebuild.gradlefile:
 Click to enlarge; ESC to exit.
c. Add the following line to the dependencies section:dependencies { compileOnly 'com.symbol:emdk:x.x.x' // e.g. ‘com.symbol:emdk:7.6.10’ ... }Sync Gradle (File -> Sync Project with Gradle Files).
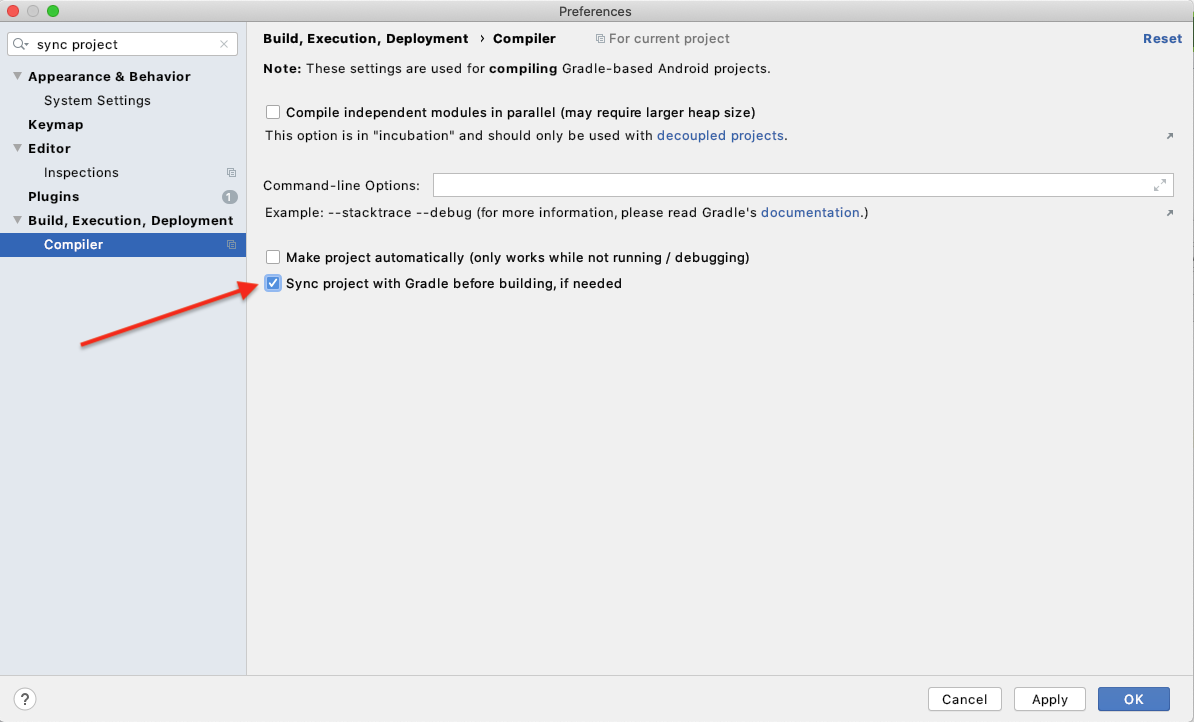
NOTE: Eliminate this step by checking the Preference box shown below:
 Click to enlarge; ESC to exit.
EMDK APIs are now ready to use.
Notes:
- A plus sign ("+") can be substituted for a major or minor version number in the dependencies section. For example, declaring
com.symbol:emdk:7.6+uses SDK versions 7.6 and newer. - See the full list of EMDK versions.
- The Java version used to compile a project is based on the
compileSdkVersionselected for the project. Different versions of Android support different versions of Java. If necessary, the default Java version can be overridden. Learn more.
Uninstall EMDK
Windows
- Close Android Studio, if open.
- From Windows -> All Programs -> EMDK for Android [vX.X], select "Uninstall."
- Follow prompts to complete the uninstallation.
Mac OS
Note: This process references folders that are hidden by default. To unhide, see section below.
In the Mac OS Finder:
- Remove SDK add-ons:
- Navigate to the
/Users/[userName]/Library/Android/sdk/add-onsdirectory. - Remove all
addon-symbol_emdk-symbol-XXfolders, if present.
- Navigate to the
- Remove Wizard Core:
- Navigate to the
/Users/Shareddirectory. - Remove the "EMDK for Android" folder, if present.
- Navigate to the
- Remove Wizard plug-in:
- Open Applications folder.
- Locate and right-click Android Studio app.
- Select "Show Package Contents" from the menu.
- Navigate to
Contents->pluginsdirectory. - Remove
com.symbol.emdk.wizard.intellijIdeafolder, if present.
To unhide Mac OS folders:
Open Terminal app (in Finder -> Applications -> Utilities).
Paste the following into Terminal window (and hit RETURN):
defaults write com.apple.finder AppleShowAllFiles YESRight-click on the Finder icon (in the Dock) while holding the "Option/alt" key.
Select "Relaunch" from the menu to make hidden files visible.
To reverse, replace "YES" with "NO" in the Terminal command and repeat Step 3.