Overview
IP Output allows captured data to be sent to a specified IP address and port using either TCP or UDP transport protocols. Zebra recommends that the receiving machine be running Windows and the Zebra IPWedge software, but it's not required.
IPWedge is a small Windows app that monitors a network port and receives scanned data sent by devices using the DataWedge IP Output option. The receiving PC inserts the data as keystrokes into the foreground application or the Windows Clipboard, essentially using the device as a wireless scanner.
Prerequisites
Using IPWedge requires the following:
- A PC with Windows and the .NET Framework 3.5 (SP 1 or later)
- A Zebra device running Android 4.4 KitKat (or later)
- DataWedge for Android 1.5 (or later)
IP Output Setup
From the Profile in which to activate IP Output:
1. Locate the IP Output section of the Profile.
2. Check "Enabled" and "Remote Wedge" boxes to enable IP Output and communication with the IPWedge Windows app:
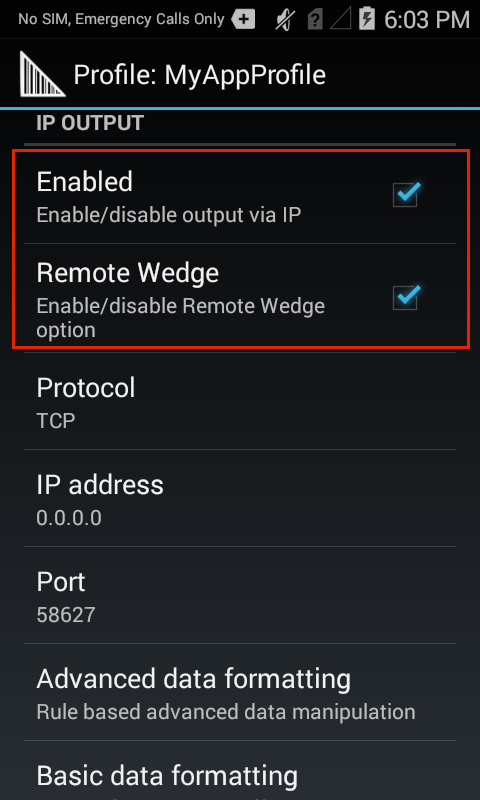 IP Output options
3. Select the desired Protocol (TCP or UDP) for data transport (default=TCP).
4. Enter the IP address of the system that's running IPWedge.
5. Enter the Port number if other than the default of 58627.
Using IP Output Plug-in without IPWedge
To use IP Output to send captured data to a remote device that's not running IPWedge, the system at the receiving end must be running a client app that monitors a port for data coming via TCP or UDP on the port specified on the device as described above. Warning: Zebra does not support this usage scenario.
Configure IP Output to send captured data to a remote computer or device:
1. Locate the IP Output section of the Profile.
2. Check "Enabled" box and uncheck the "Remote Wedge" box.
3. Select the desired Protocol (TCP or UDP) for data transport (default=TCP).
4. Enter the IP address of the server or device to receive the data.
5. Enter the Port number (if other than the default of 58627).
Warning: Zebra does not support this usage scenario.
Set Up IPWedge
1. Visit the IP Wedge for Windows download page at the Zebra Support Portal, accept the EULA and download.
Note: Windows Mobile/CE devices might need a different version of IPWedge. Visit the Windows Mobile/CE download page for more information.
2. Install the .zip file on the system to which the scanned data will be sent.
3. Run the IPWedge app. A screen appears similar to the image below. Make a note of the IP address and port number (in the red box).
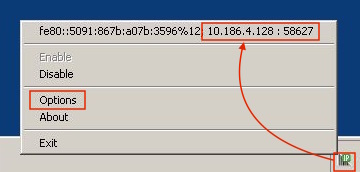 IPWedge System Tray menu shows system IP address and monitored port
Note: The port number must be the same as that specified in IP Output on the device.
4. Open the IPWedge app from the Windows Start menu or click on the IPWedge icon in the System Tray and select "Options" from the menu.
The IPWedge Options panels appears similar to the images below.
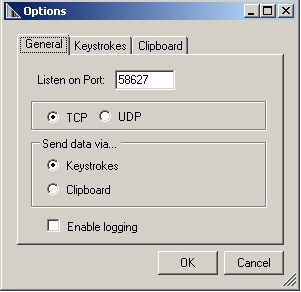 General Options
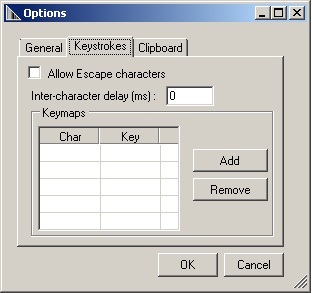 Keystroke Options
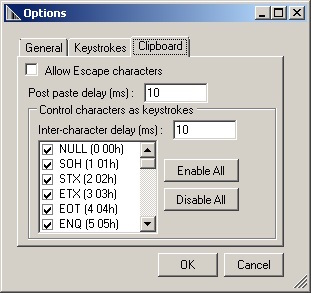 Clipboard Options
5. Make any required changes to Options in the General, Keystroke and Clipboard tabs. Click OK on each tab to save settings.
The PC is now ready to receive data from DataWedge IP Output (with IP address and port settings matching those of the PC).
Other DataWedge Output Options:
Related guides: